Stock Transfer
This document explains the steps to perform a Stock Transfer between stores or between warehouses in the Jova POS system. This process allows you to move stock items from one location to another.
Stock Transfer Flow
- Access the Inventory → Stock Transfer menu.
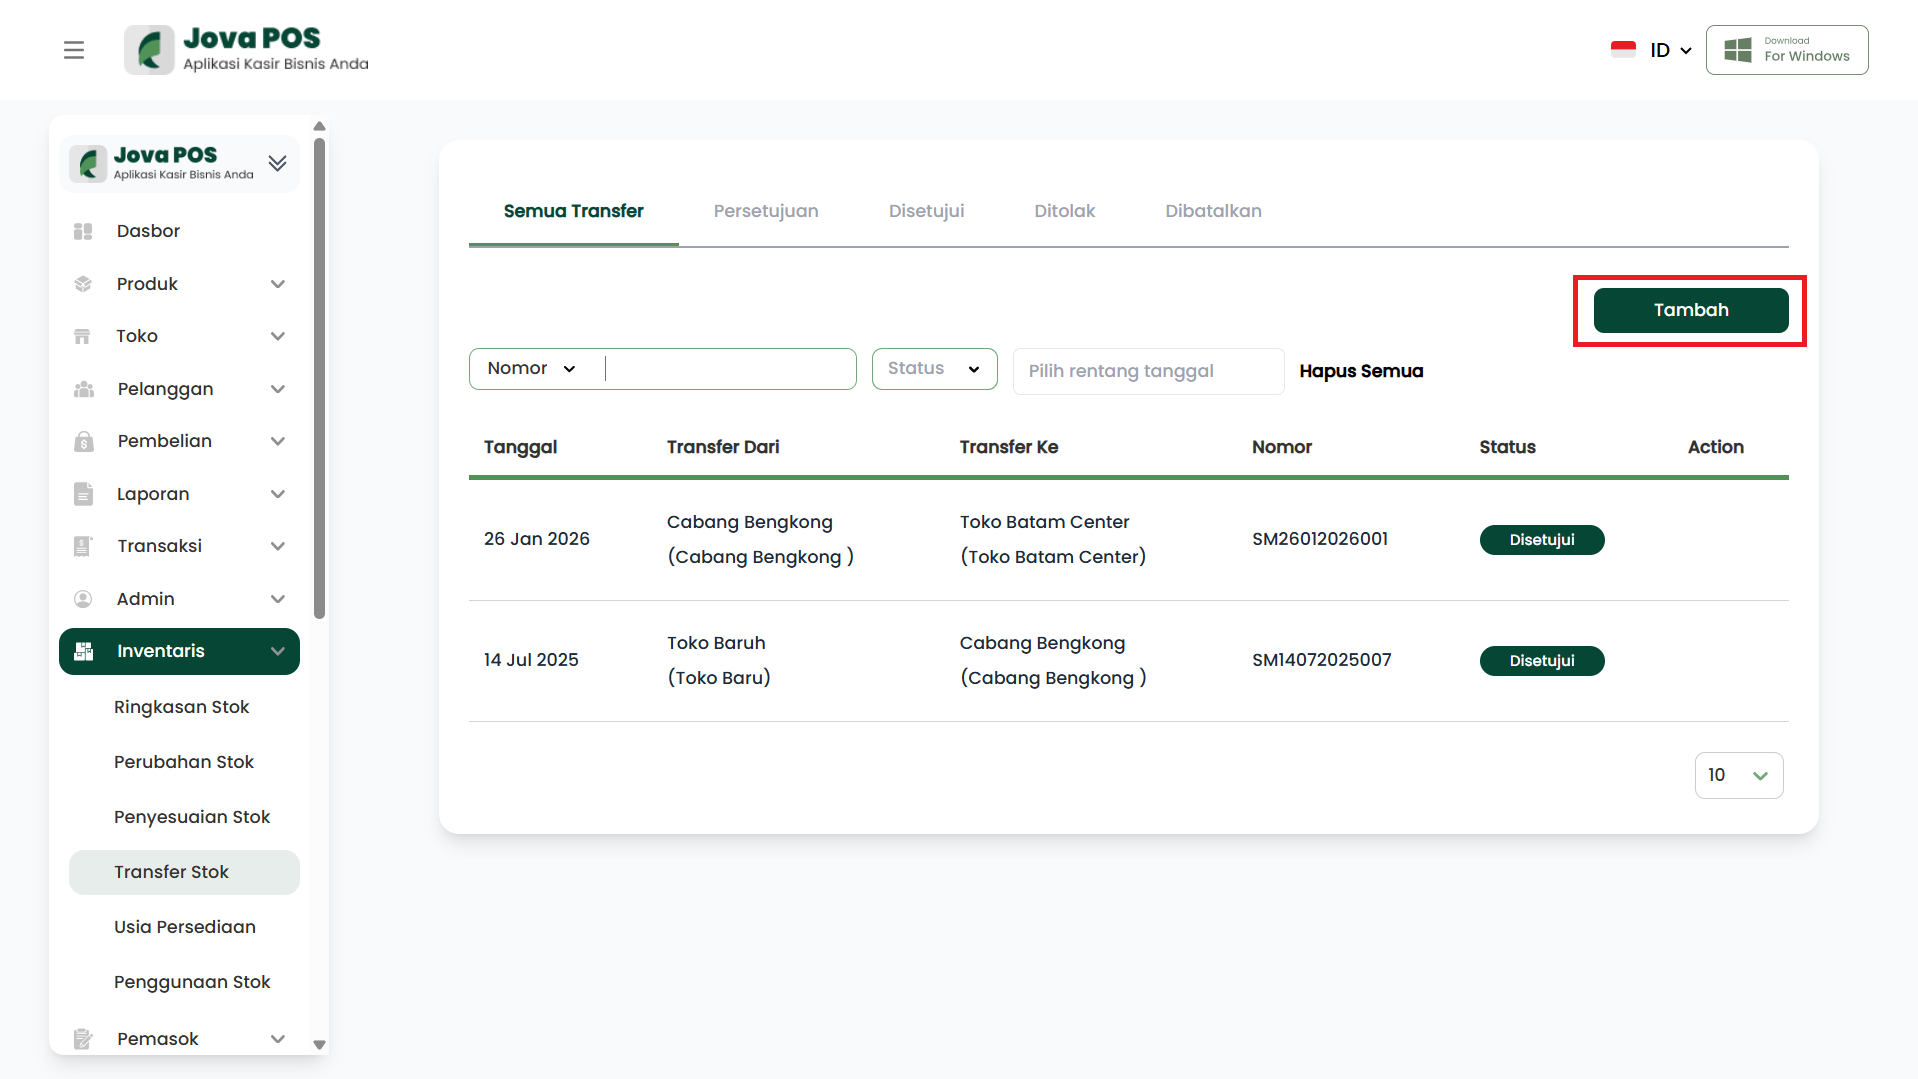
- Click the Add button to create a new stock transfer request.
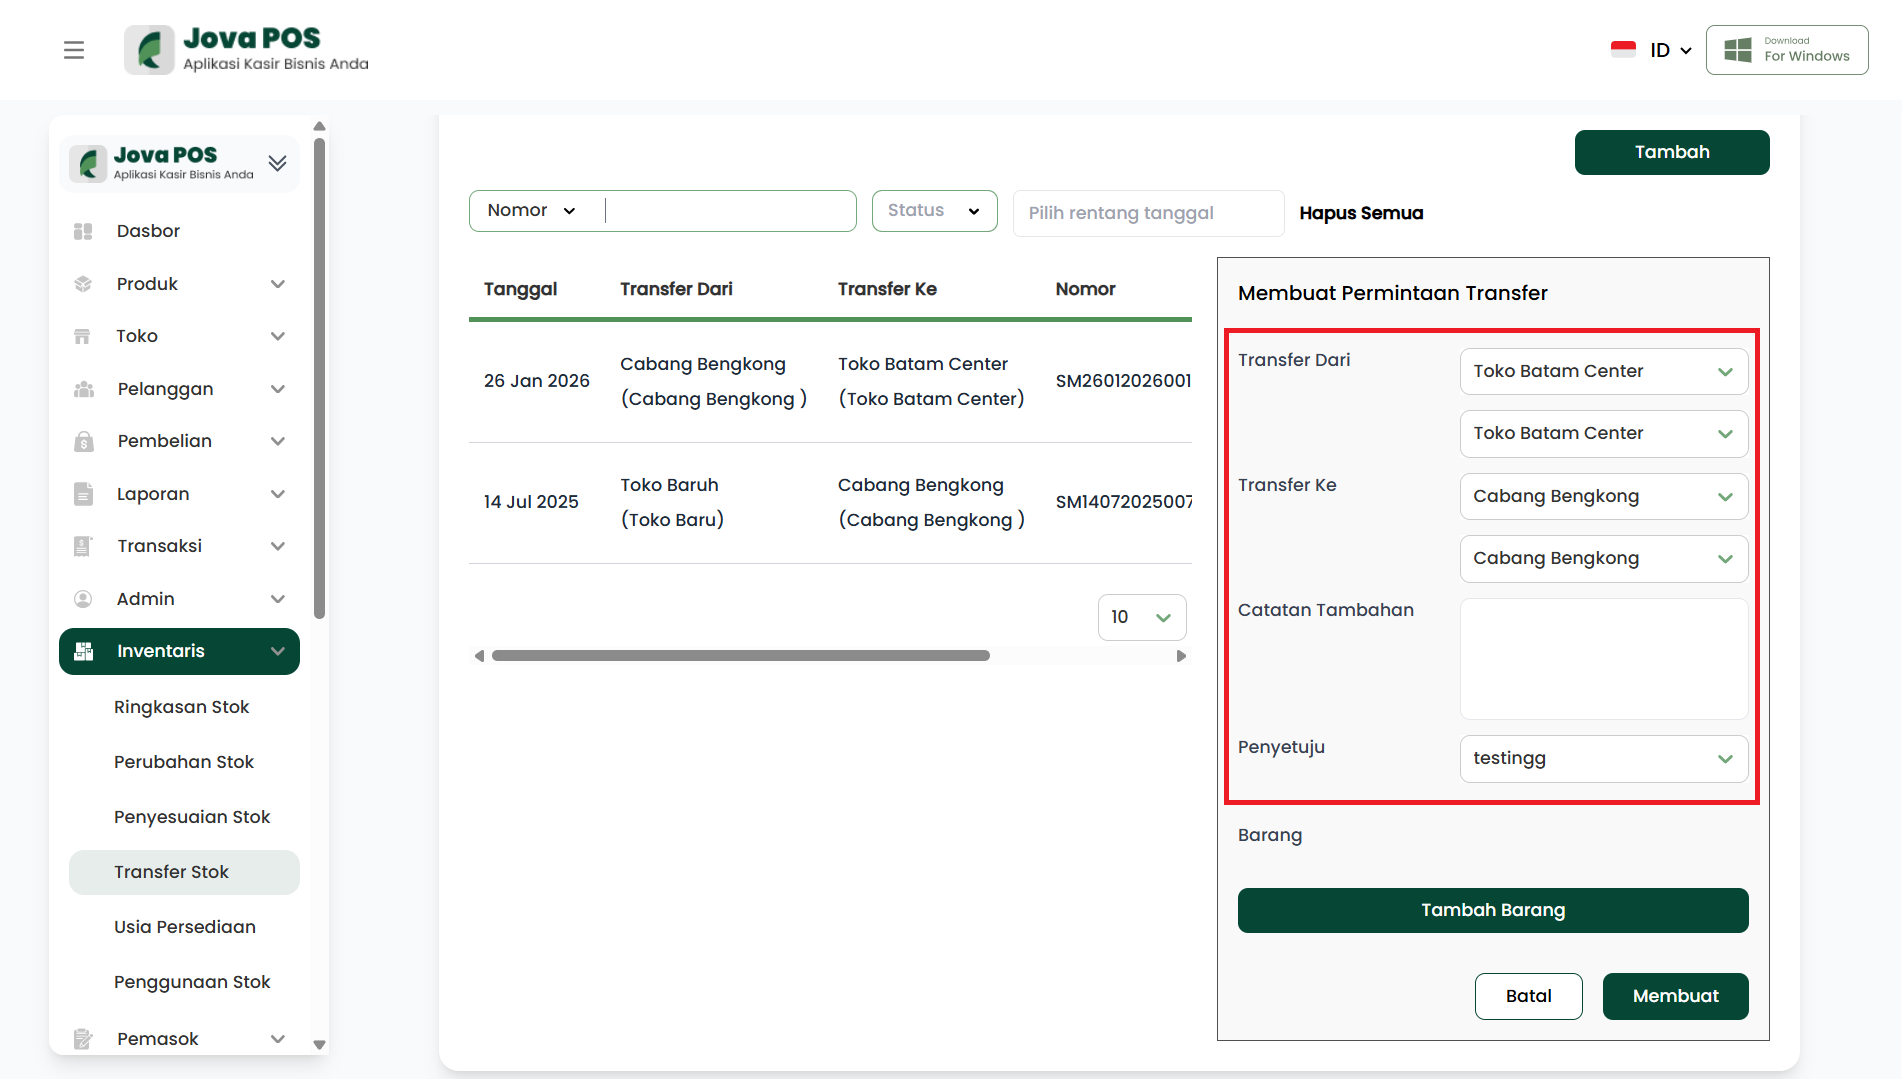
- Select Transfer From and Transfer To (relevant store or warehouse).
- Add additional notes if needed.
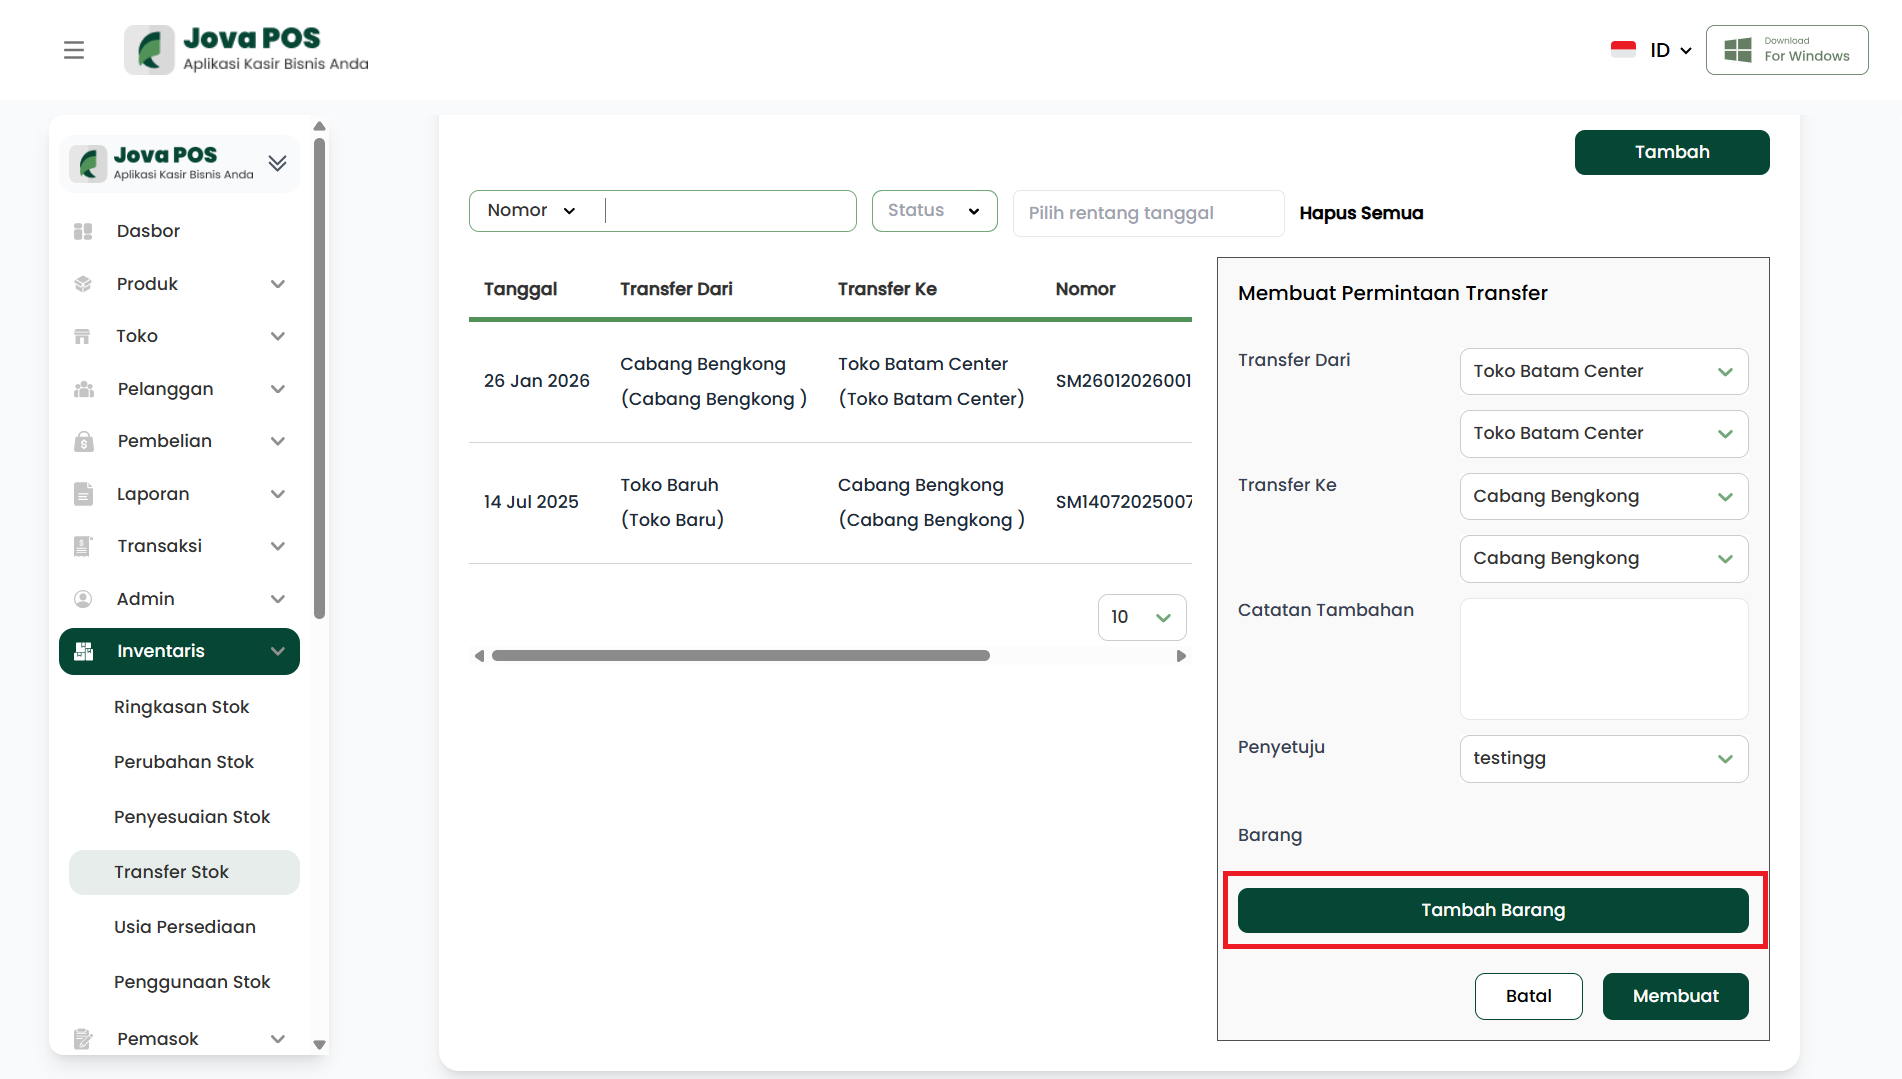
- Select the items to transfer.
- Click Create to complete the transfer request.
1. Accessing the Stock Transfer Menu
- In the sidebar, click Inventory.
- Select Stock Transfer.
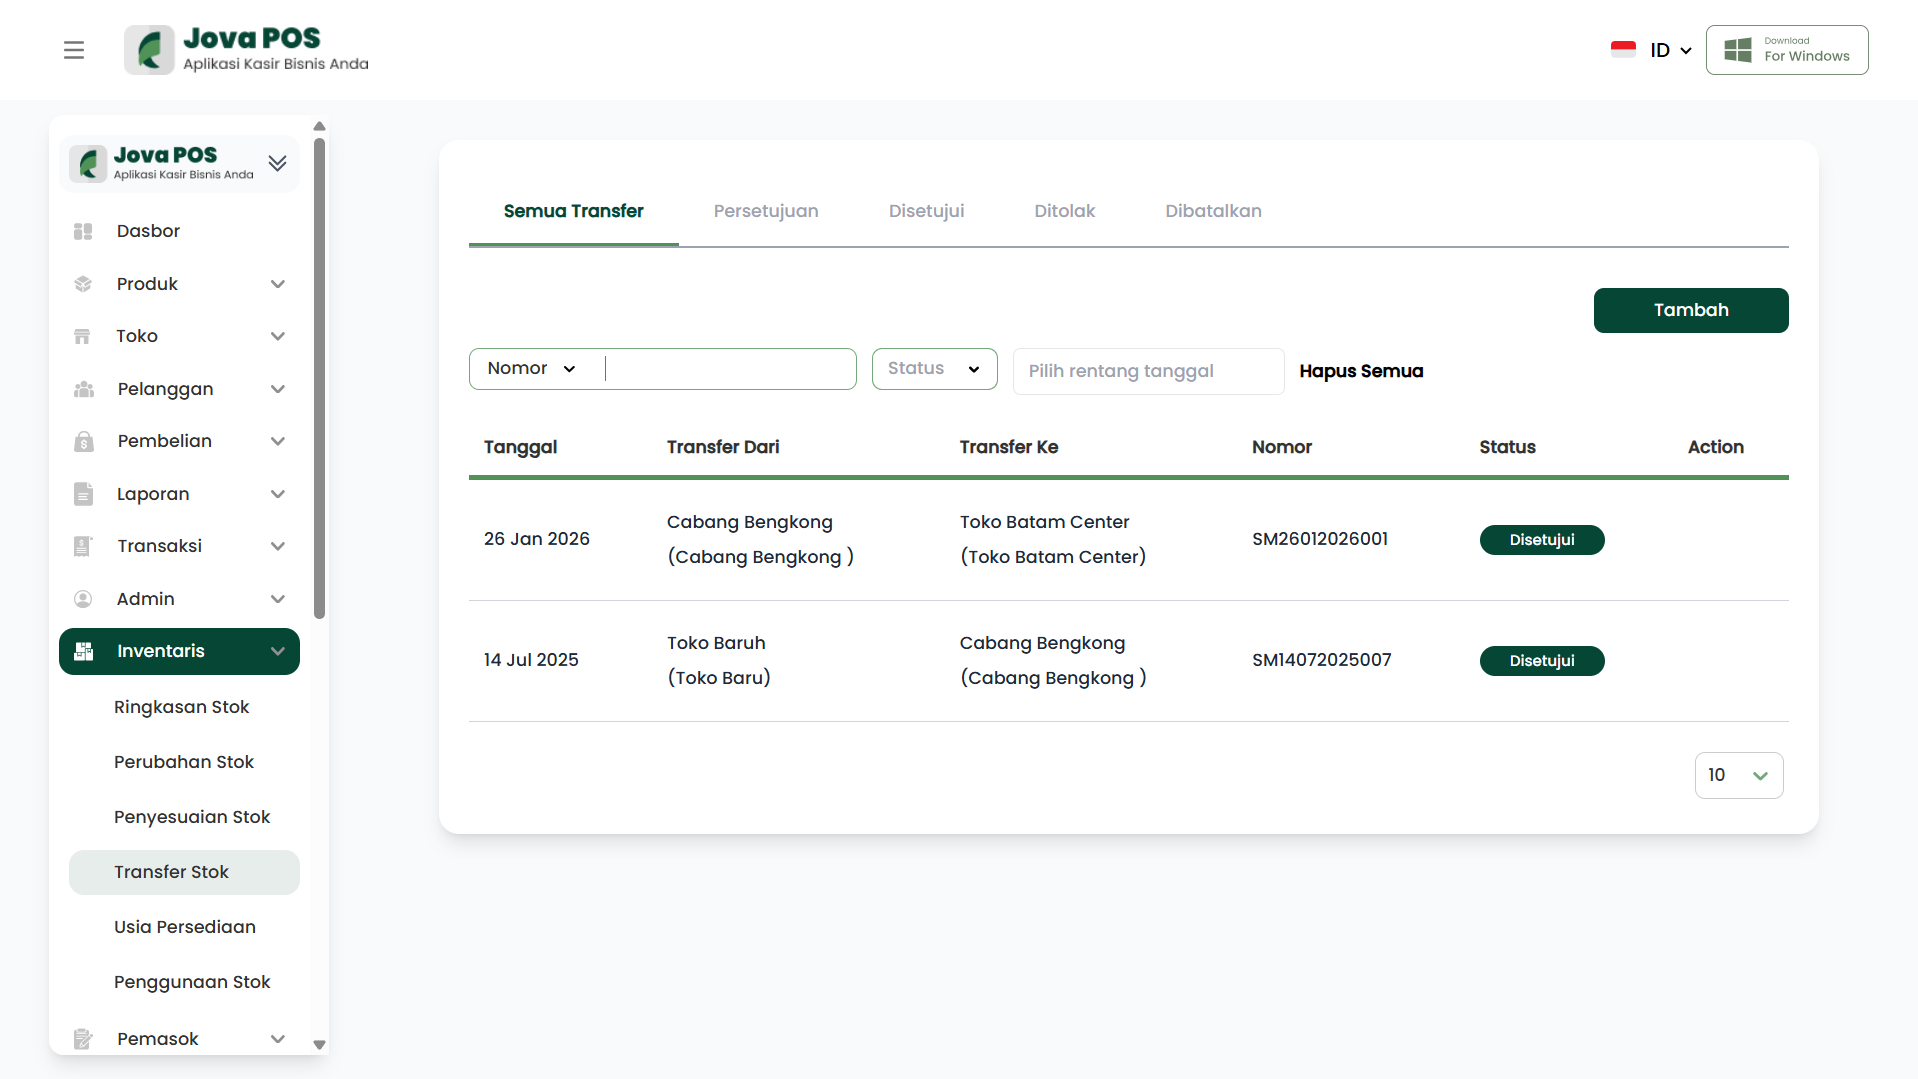
2. Creating a New Stock Transfer Request
To create a new stock transfer request, click the Add button located in the top right corner of the page.
3. Selecting Transfer From and Transfer To
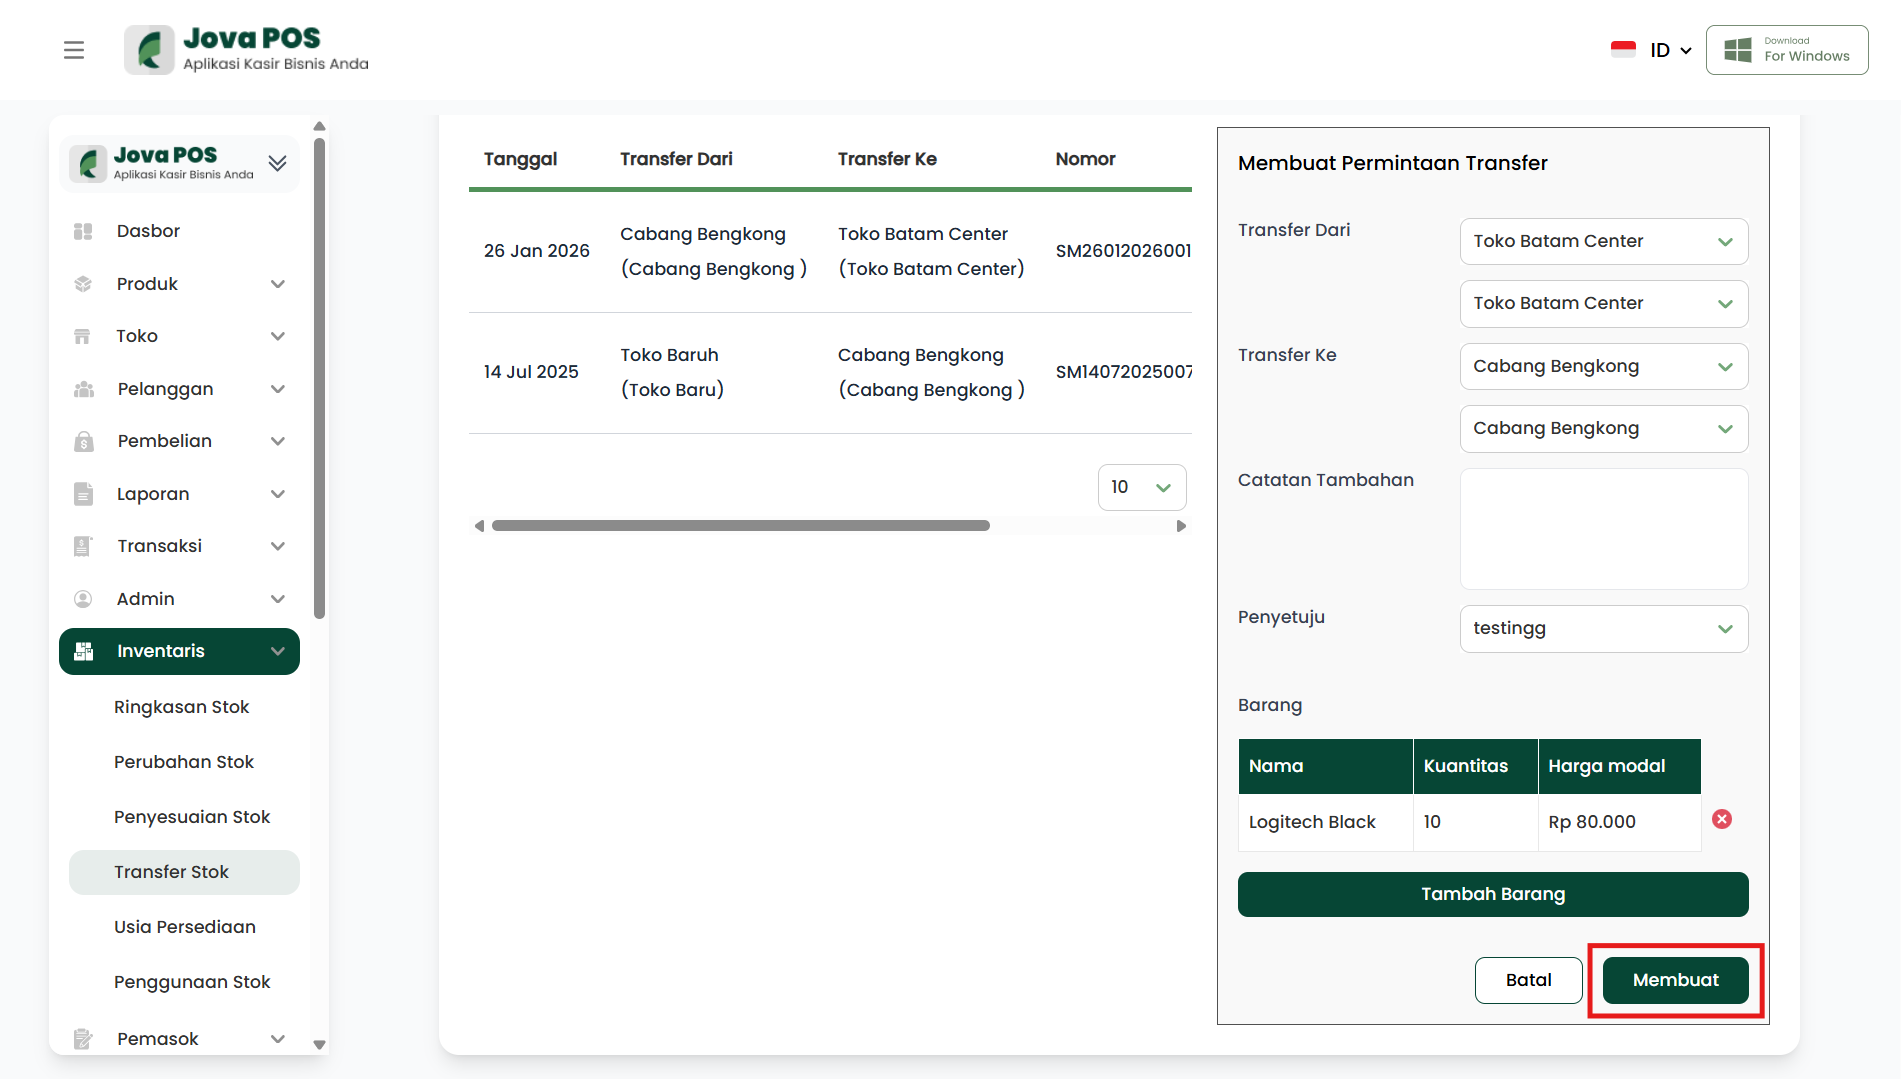
On the Create Stock Transfer Request page, select the relevant Transfer From and Transfer To locations. You will need to choose the source and destination locations for the transfer.
Transfer From and Transfer To Form
- Select Transfer From (source store or warehouse).
- Select Transfer To (destination store or warehouse).
4. Adding Additional Notes
You can add additional notes for the stock transfer (optional). These notes are useful for recording the reason or other details related to the transfer.
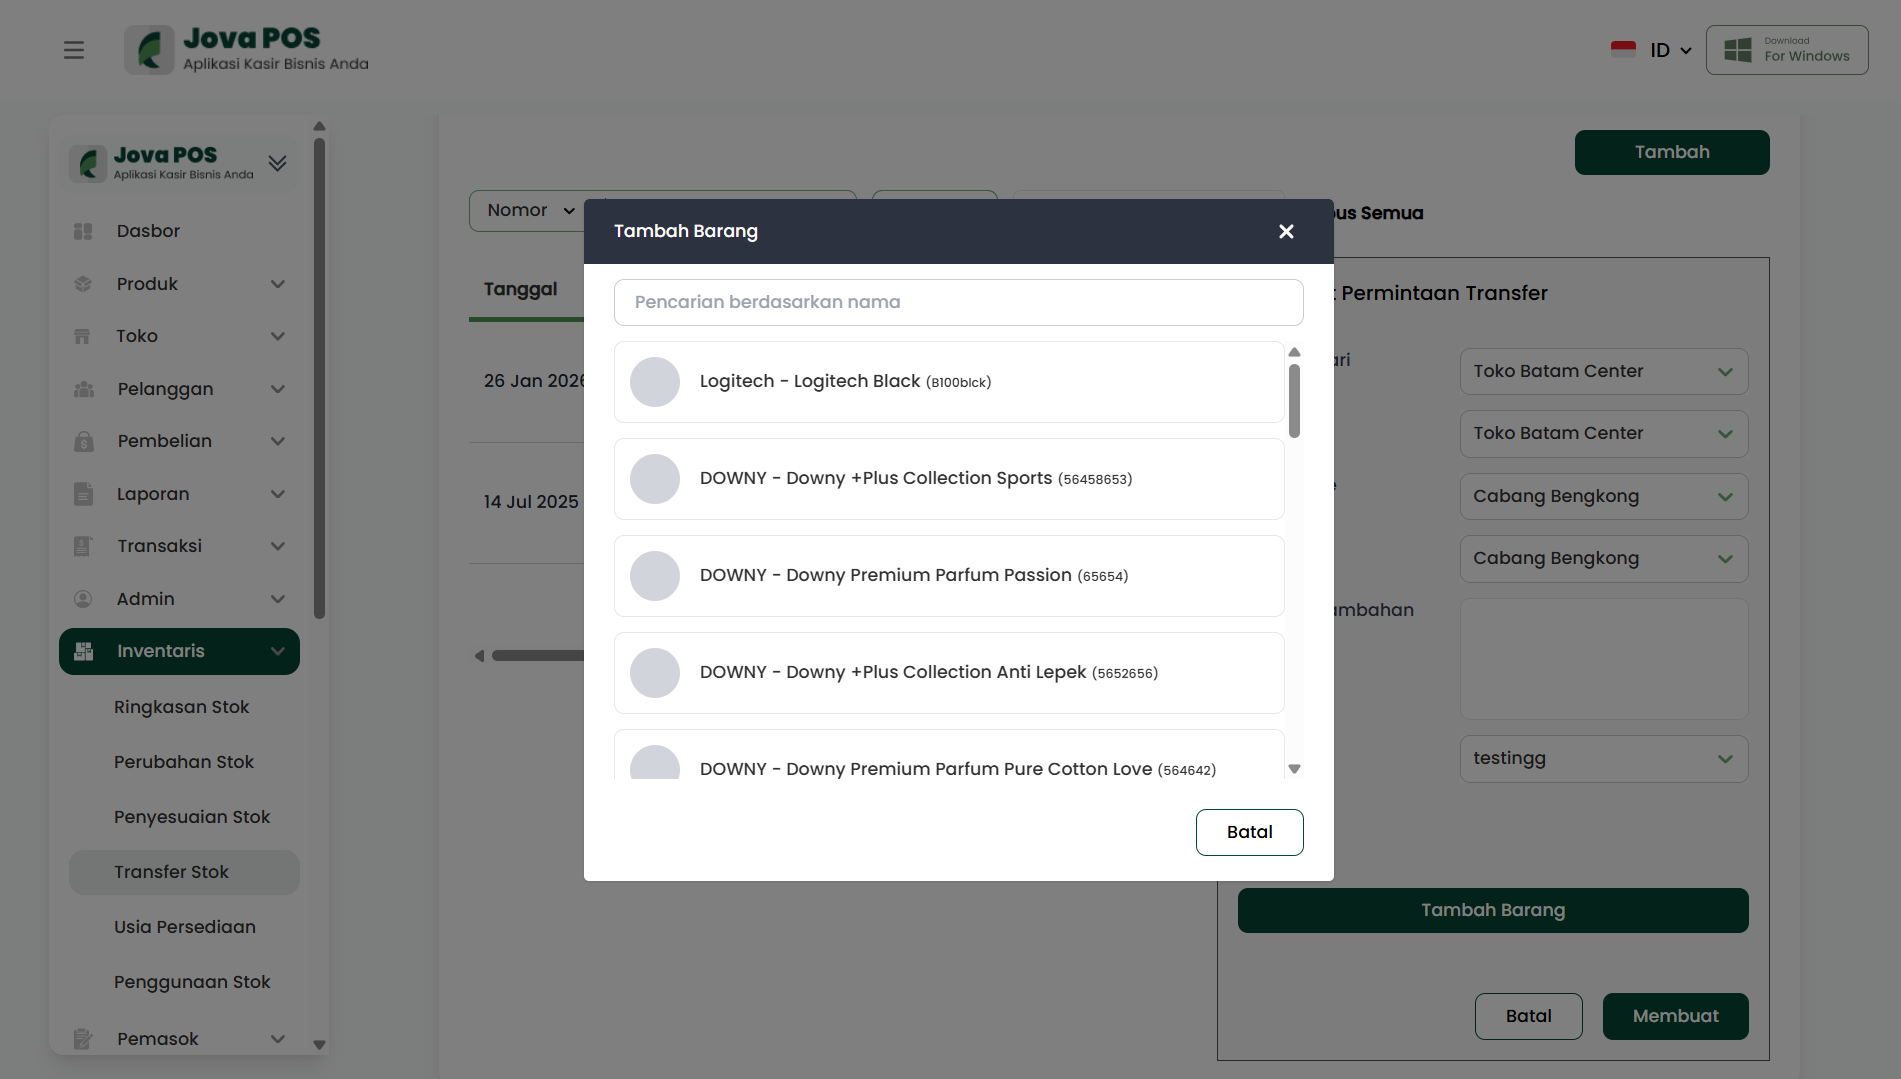
5. Selecting Items for Stock Transfer
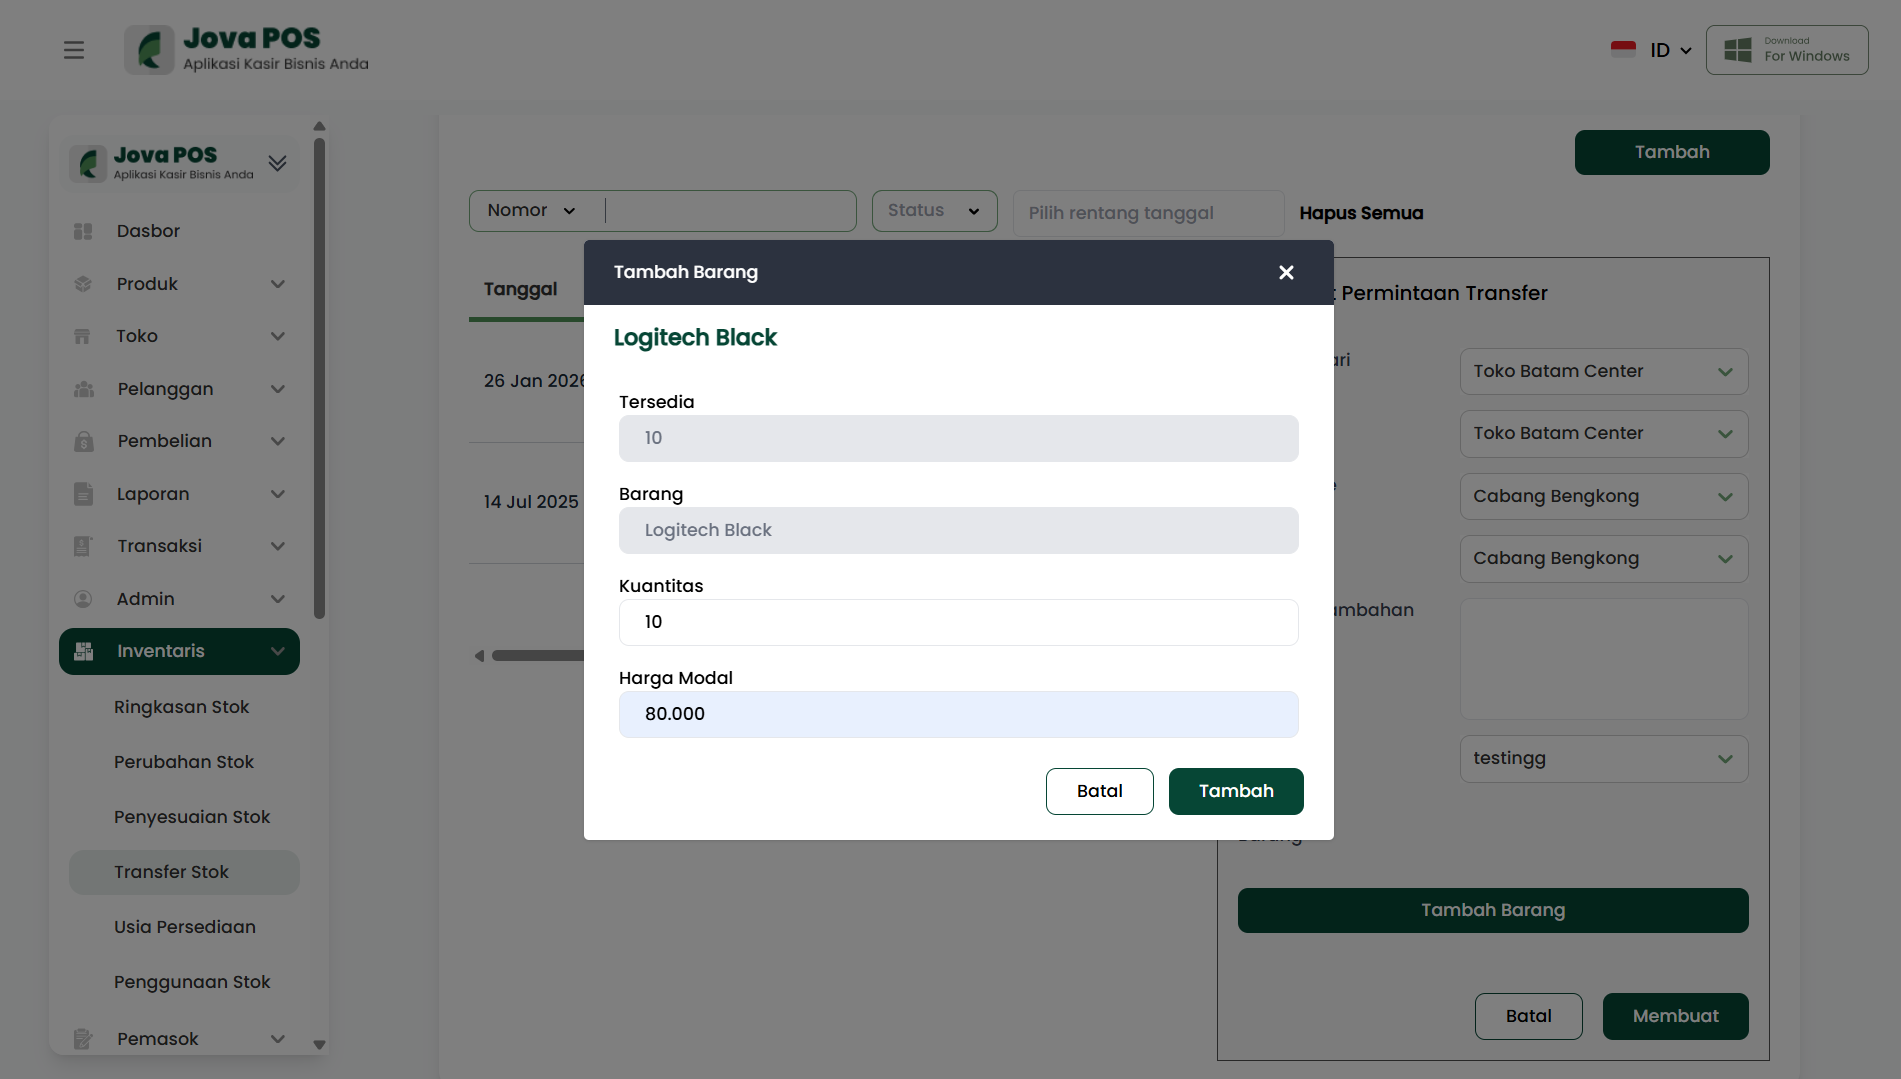
After selecting the transfer locations, choose the items to transfer. You can select items from the available list.
- Item Name: Select the item to transfer.
- Quantity: Specify the quantity of items to transfer.
- Cost Price: Specify the cost per unit if needed.
6. Completing the Stock Transfer Request
After selecting the items to transfer, click Create to complete the stock transfer process.
7. Stock Transfer List
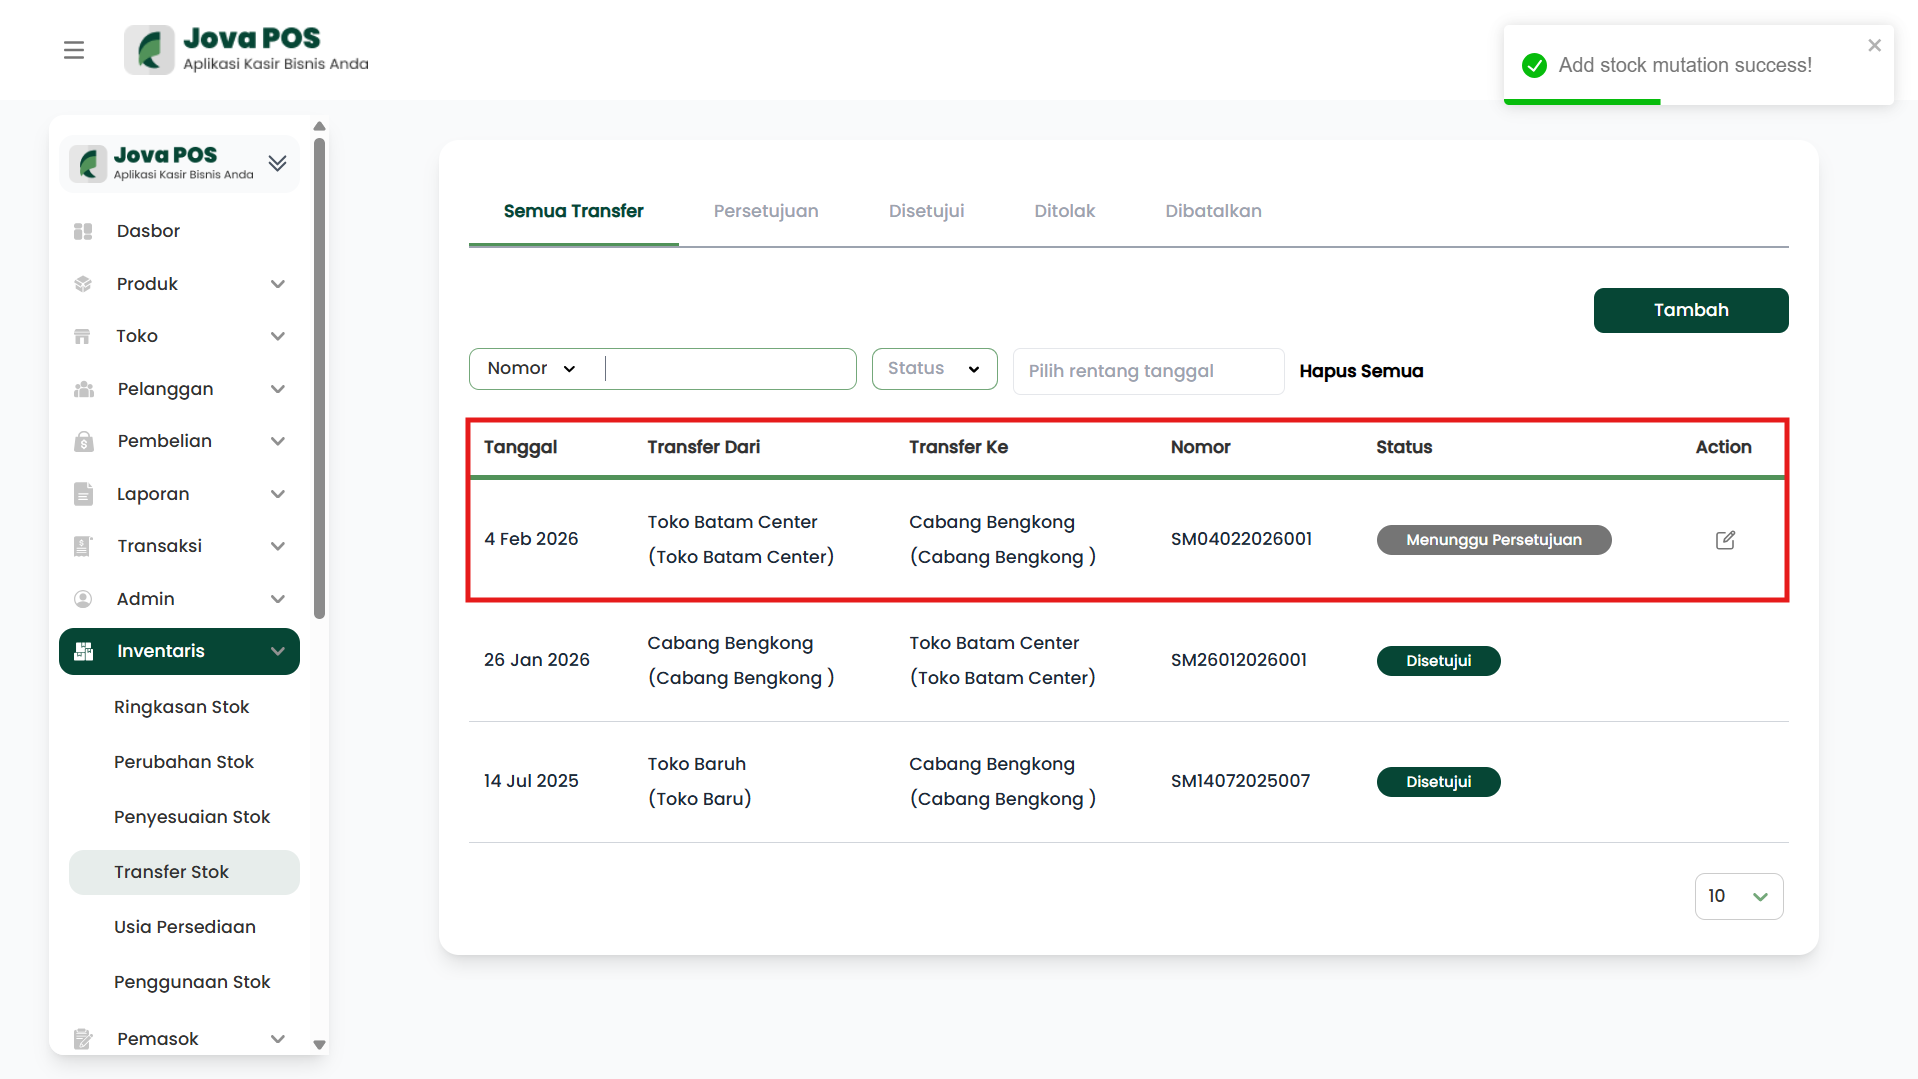
After the stock transfer request is complete, you can view the list of transfer requests that have been made. The table will display the following information:
- Date
- Transfer From
- Transfer To
- Number
- Status (Pending Approval, Approved, Rejected)
- Action (View)
Search and filter features will help you find transfer data by Number, Store, Warehouse, and Status.
Search Filters
- Select Store: Choose the relevant store to view stock transfers related to that store.
- Select Warehouse: Choose a warehouse to filter stock transfers by warehouse location.
- Select Status: Specify the transfer status (Pending Approval, Approved, Rejected).
- Select Date Range: Specify the date range of transfers to display.
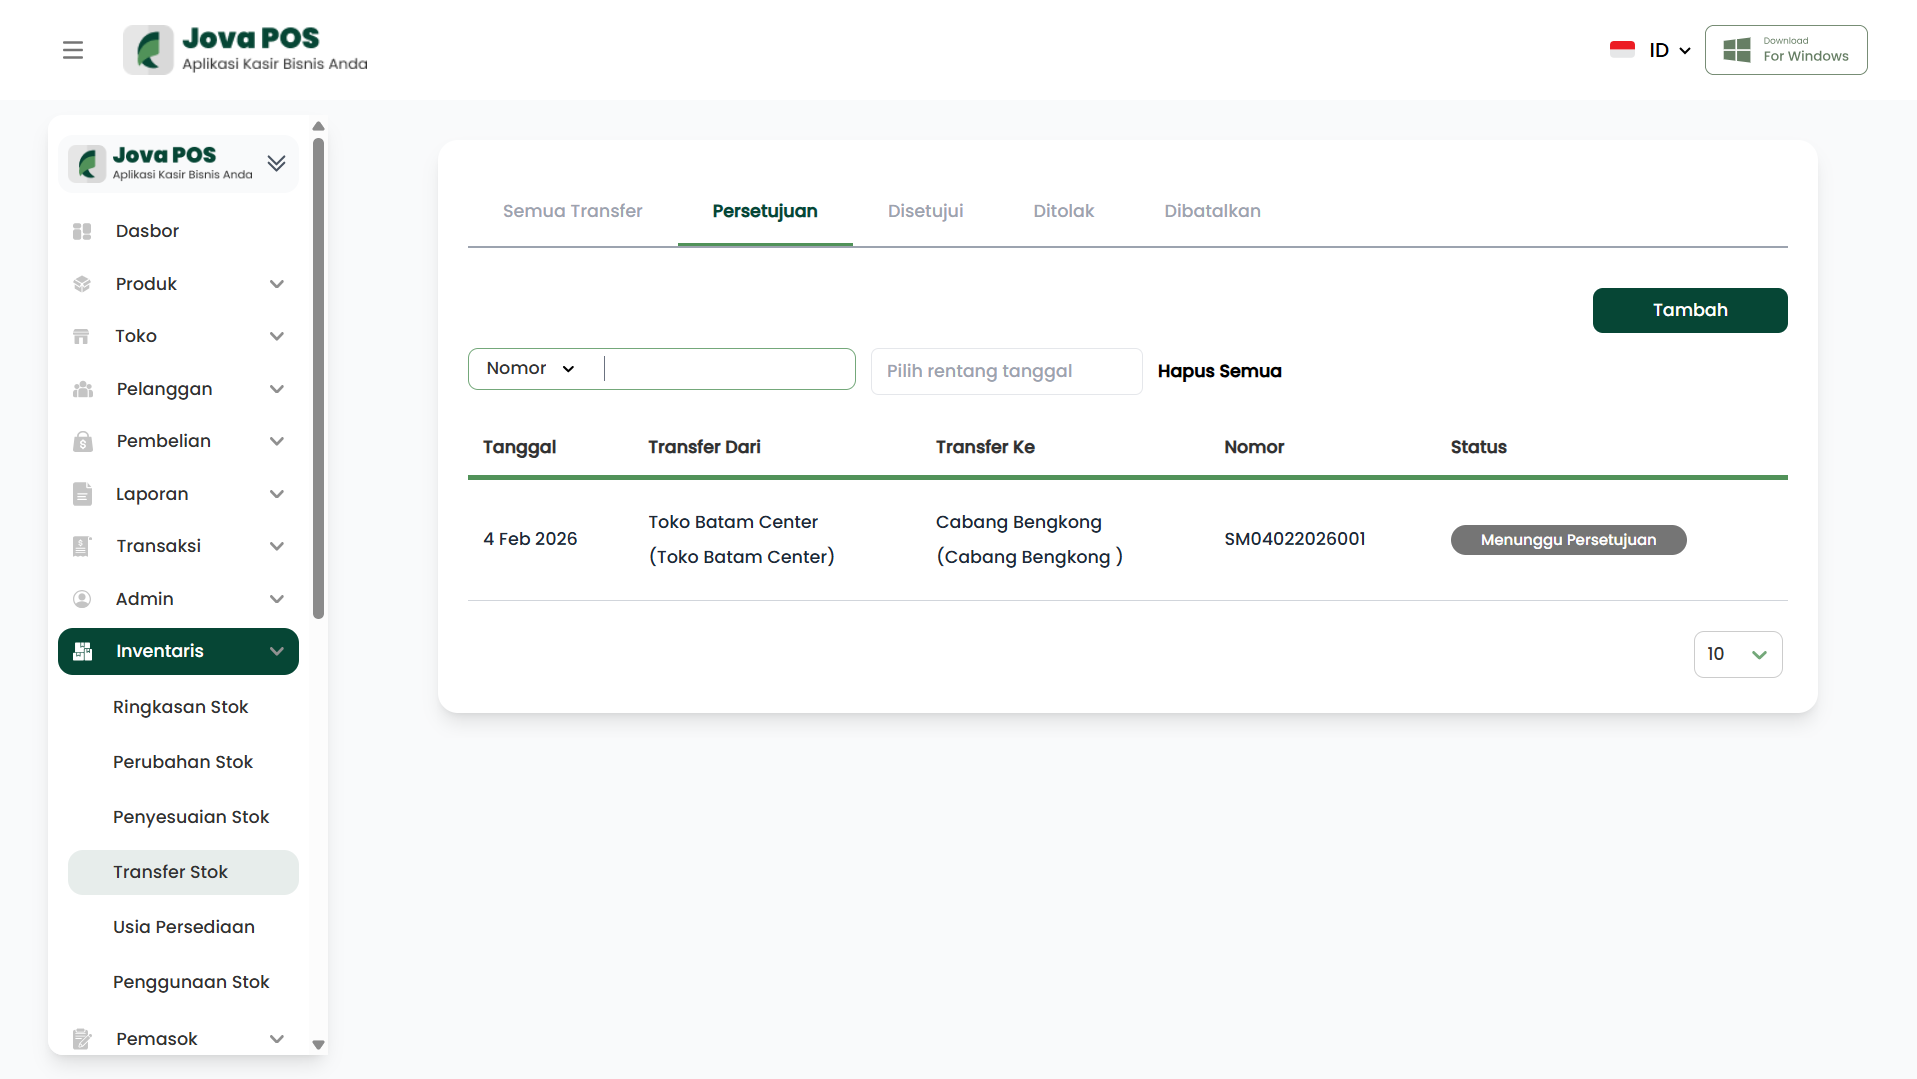
8. Approval Tab for Stock Transfer
After a transfer request is submitted, it will go into the Approval Tab. Here, authorized personnel will review the submitted transfer details and can decide to Approve or Reject the request.
9. Approving or Rejecting Transfer Requests
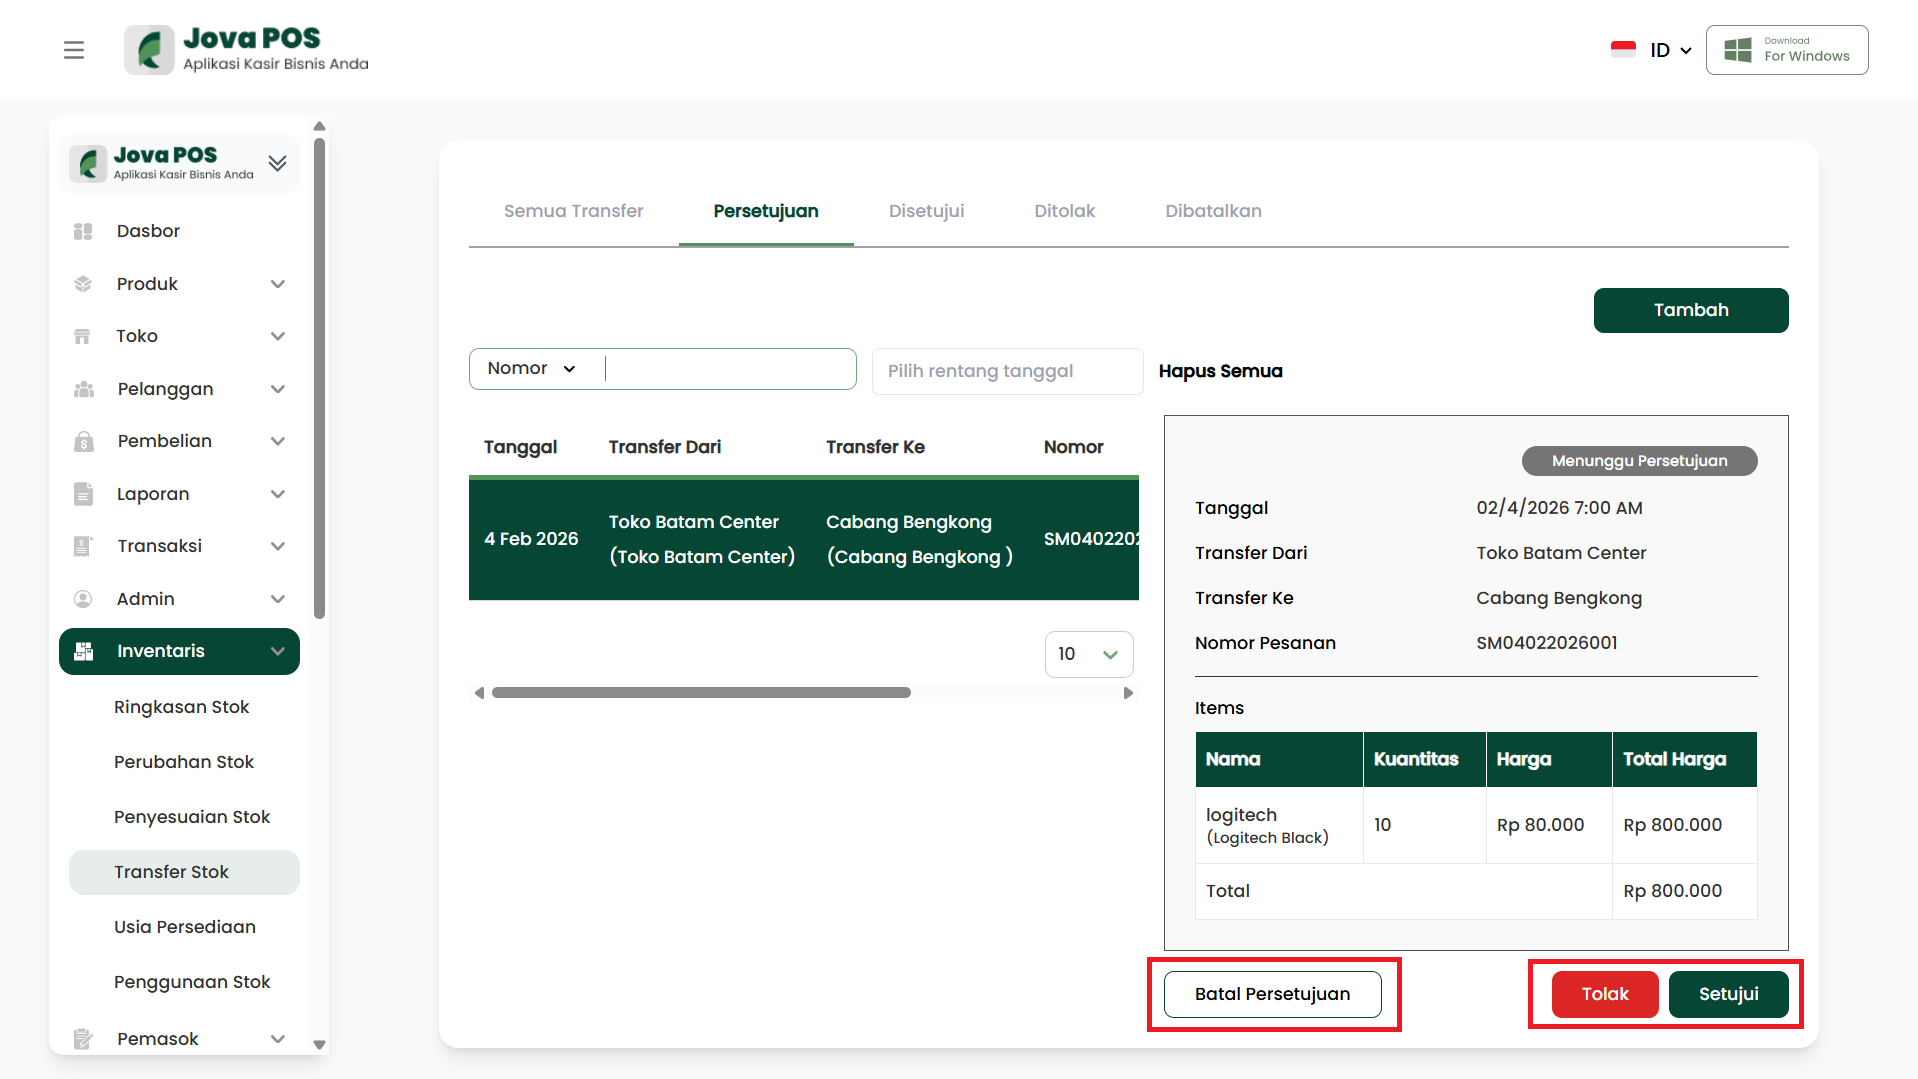
After the transfer request is submitted, authorized personnel can view the transfer details and approve or reject it.
- Click Approve to approve the transfer request.
- Click Reject to reject the transfer request.
- Click Cancel Approval to cancel the transfer approval.
10. Viewing Approved Stock Transfers
After a request is approved, you can view approved requests in the Approved tab.
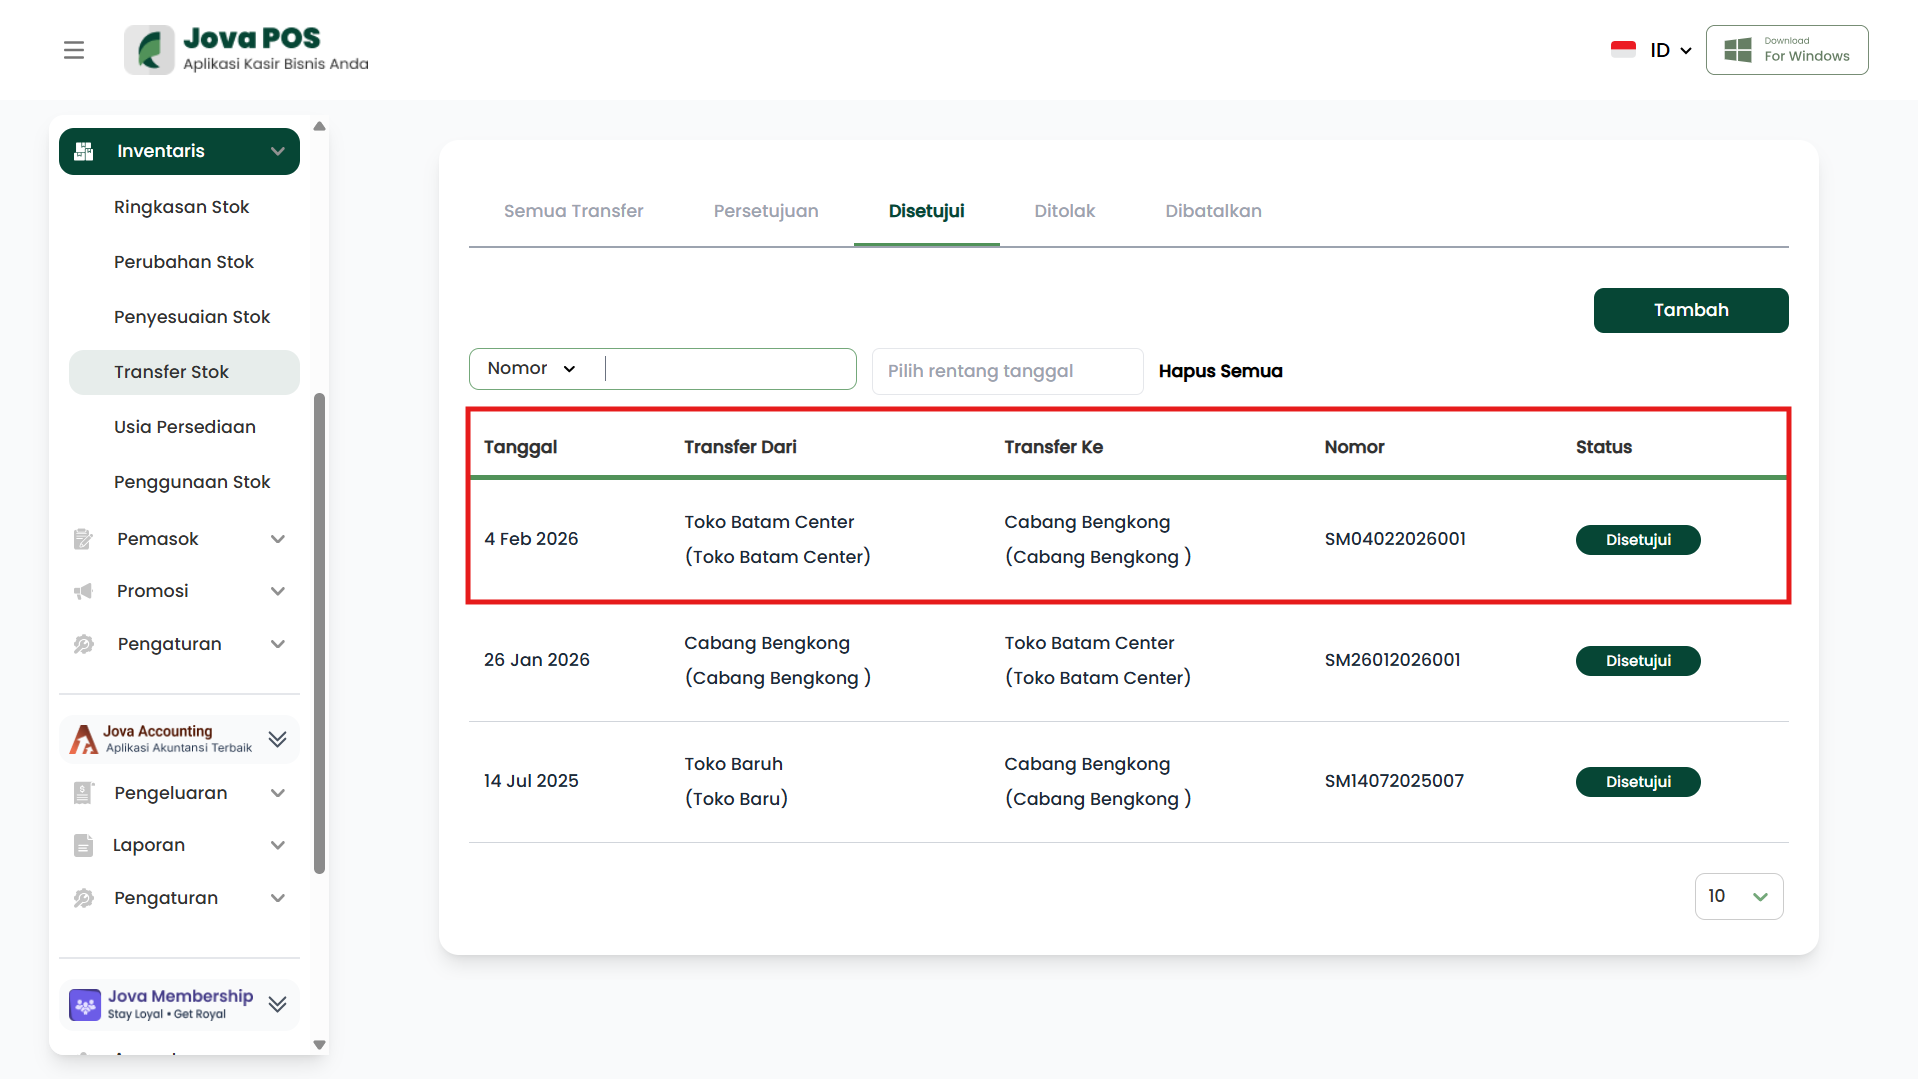
11. Accessing Approved Stock Transfer Menu
- In the sidebar, click Inventory.
- Select Stock Transfer and click the Approved tab to view the list of approved transfers.
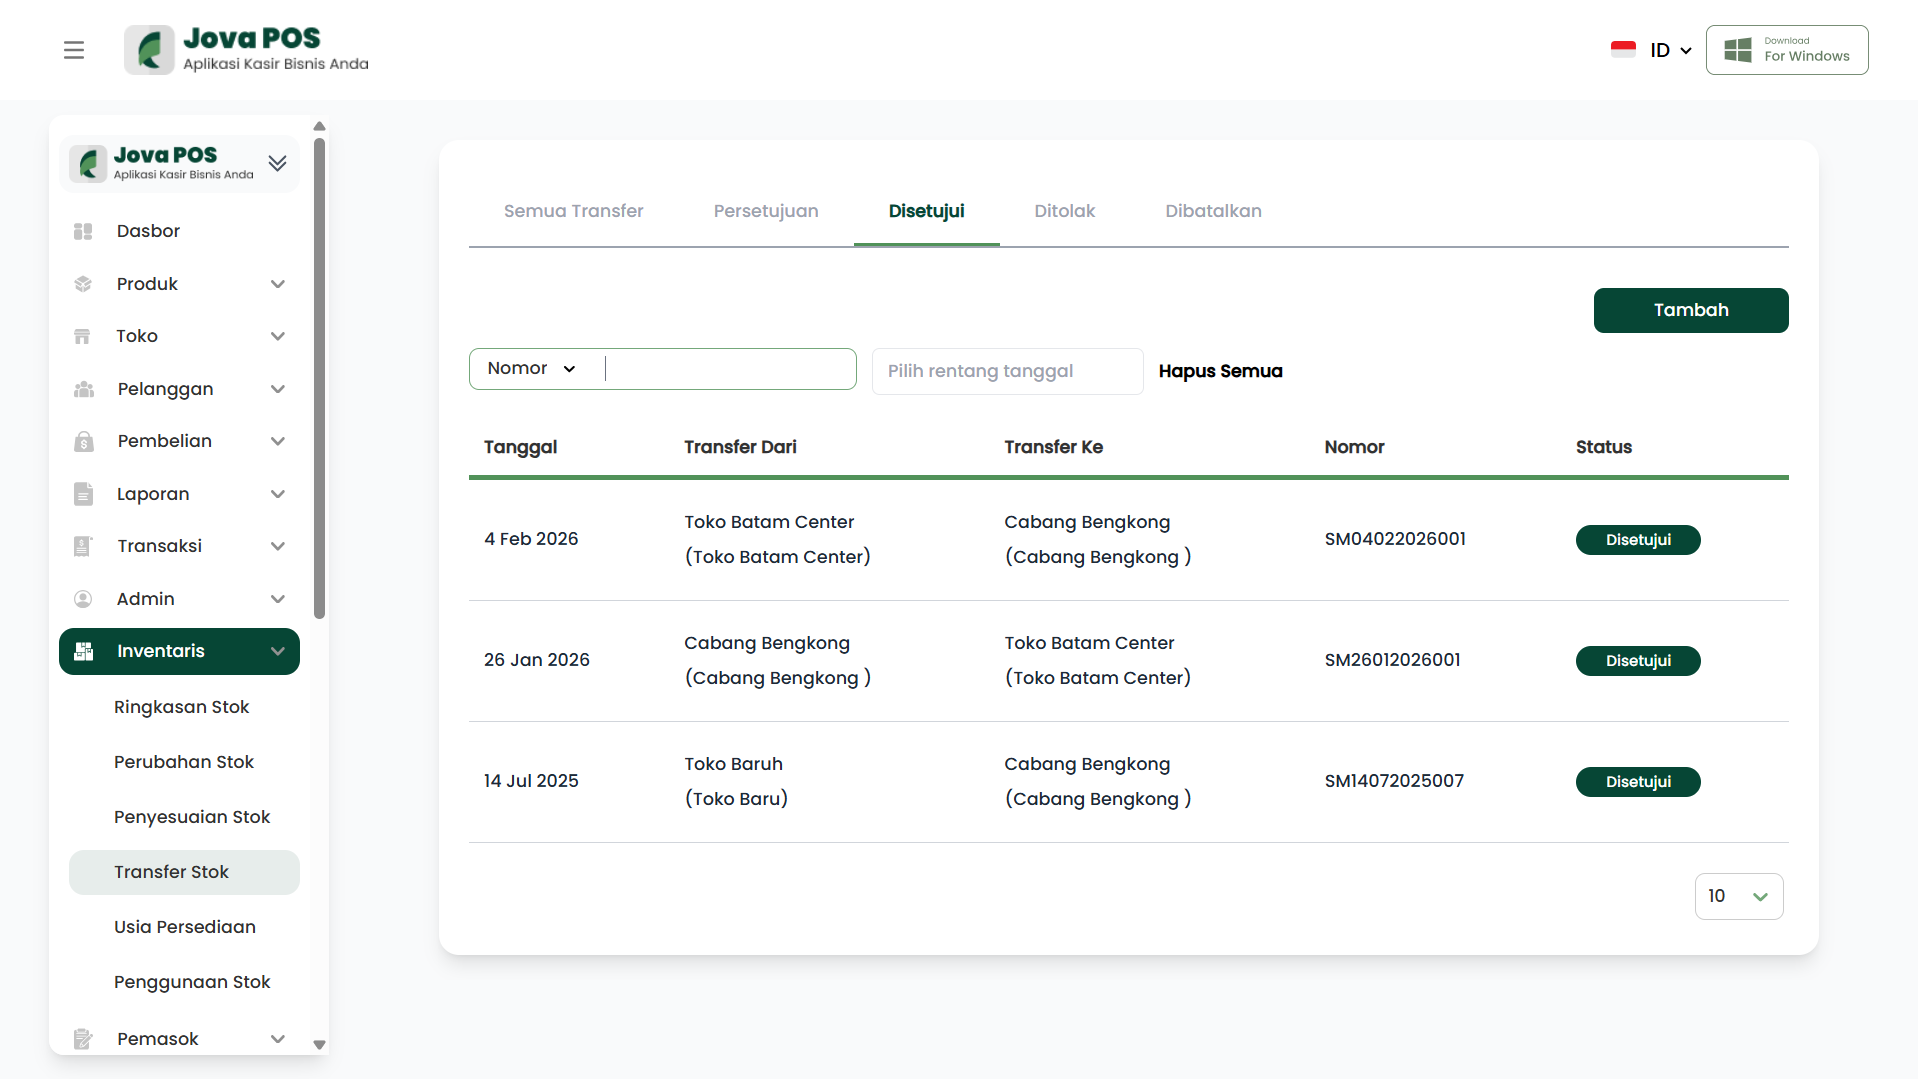
12. Viewing Approved Stock Transfer List
On the Stock Transfer → Approved page, you can view the list of approved transfers with the following information:
- Date: The date of the stock transfer.
- Transfer From: The warehouse or store that sent the items.
- Transfer To: The warehouse or store that received the items.
- Number: The reference number for the stock transfer.
- Status: The transfer status indicating approval.
Approved Stock Transfer List
| Date | Transfer From | Transfer To | Number | Status |
|---|---|---|---|---|
| 4 Feb 2026 | Toko Batam Center (Toko Batam Center) | Cabang Bengkong (Cabang Bengkong) | SM04022026001 | Approved |
| 26 Jan 2026 | Cabang Bengkong (Cabang Bengkong) | Toko Batam Center (Toko Batam Center) | SM26012026001 | Approved |
| 14 Jul 2025 | Toko Baru (Toko Baru) | Cabang Bengkong (Cabang Bengkong) | SM14072025007 | Approved |
13. Viewing Approved Stock Transfer Details
To view more details about a stock transfer, click View on the relevant transfer row.
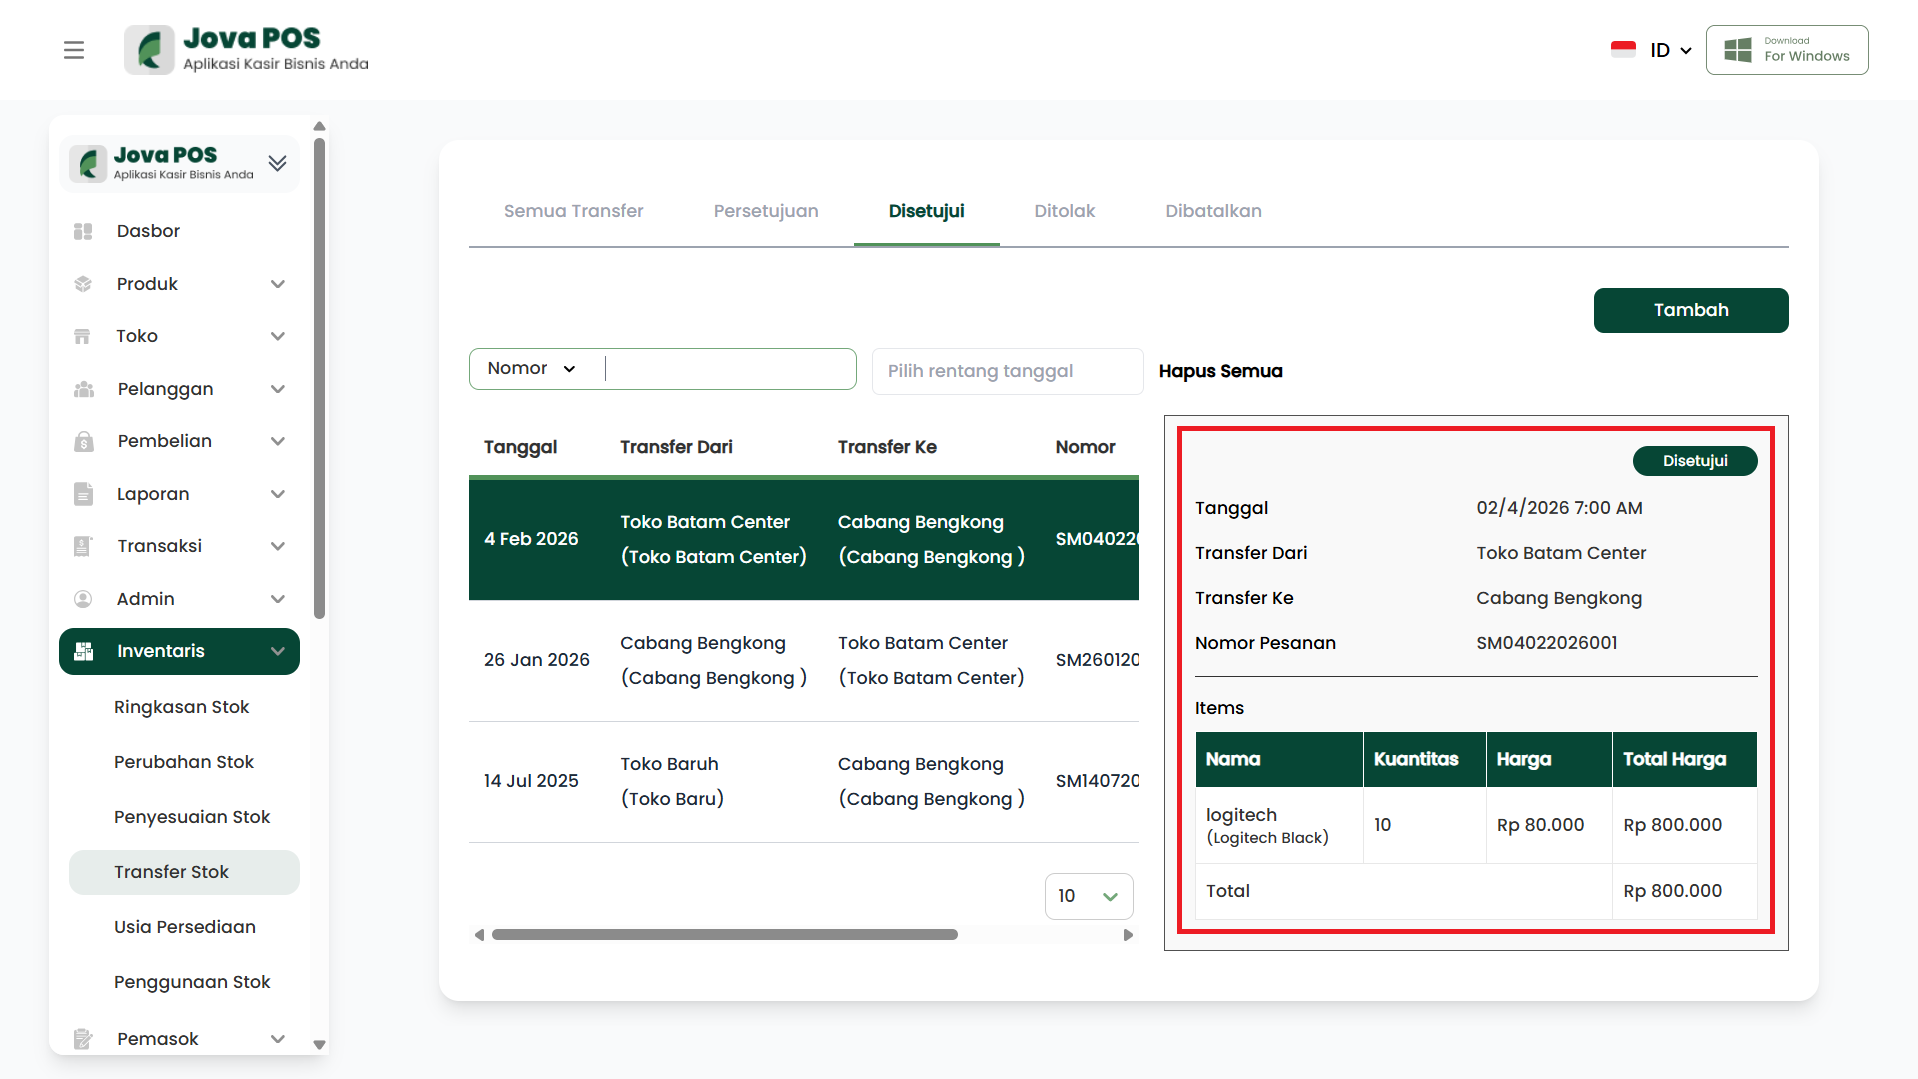
Transfer Details
- Date: 02/4/2026 7:00 AM
- Transfer From: Toko Batam Center (Toko Batam Center)
- Transfer To: Cabang Bengkong (Cabang Bengkong)
- Order Number: SM04022026001
- Items:
- Name: Logitech Black
- Quantity: 10
- Price: Rp 80.000
- Total Price: Rp 800.000
14. Managing Stock Transfers
In the Approved tab, you can add or manage stock transfer data with search and filter features to make data retrieval easier by Number, Transfer From, or Transfer To.
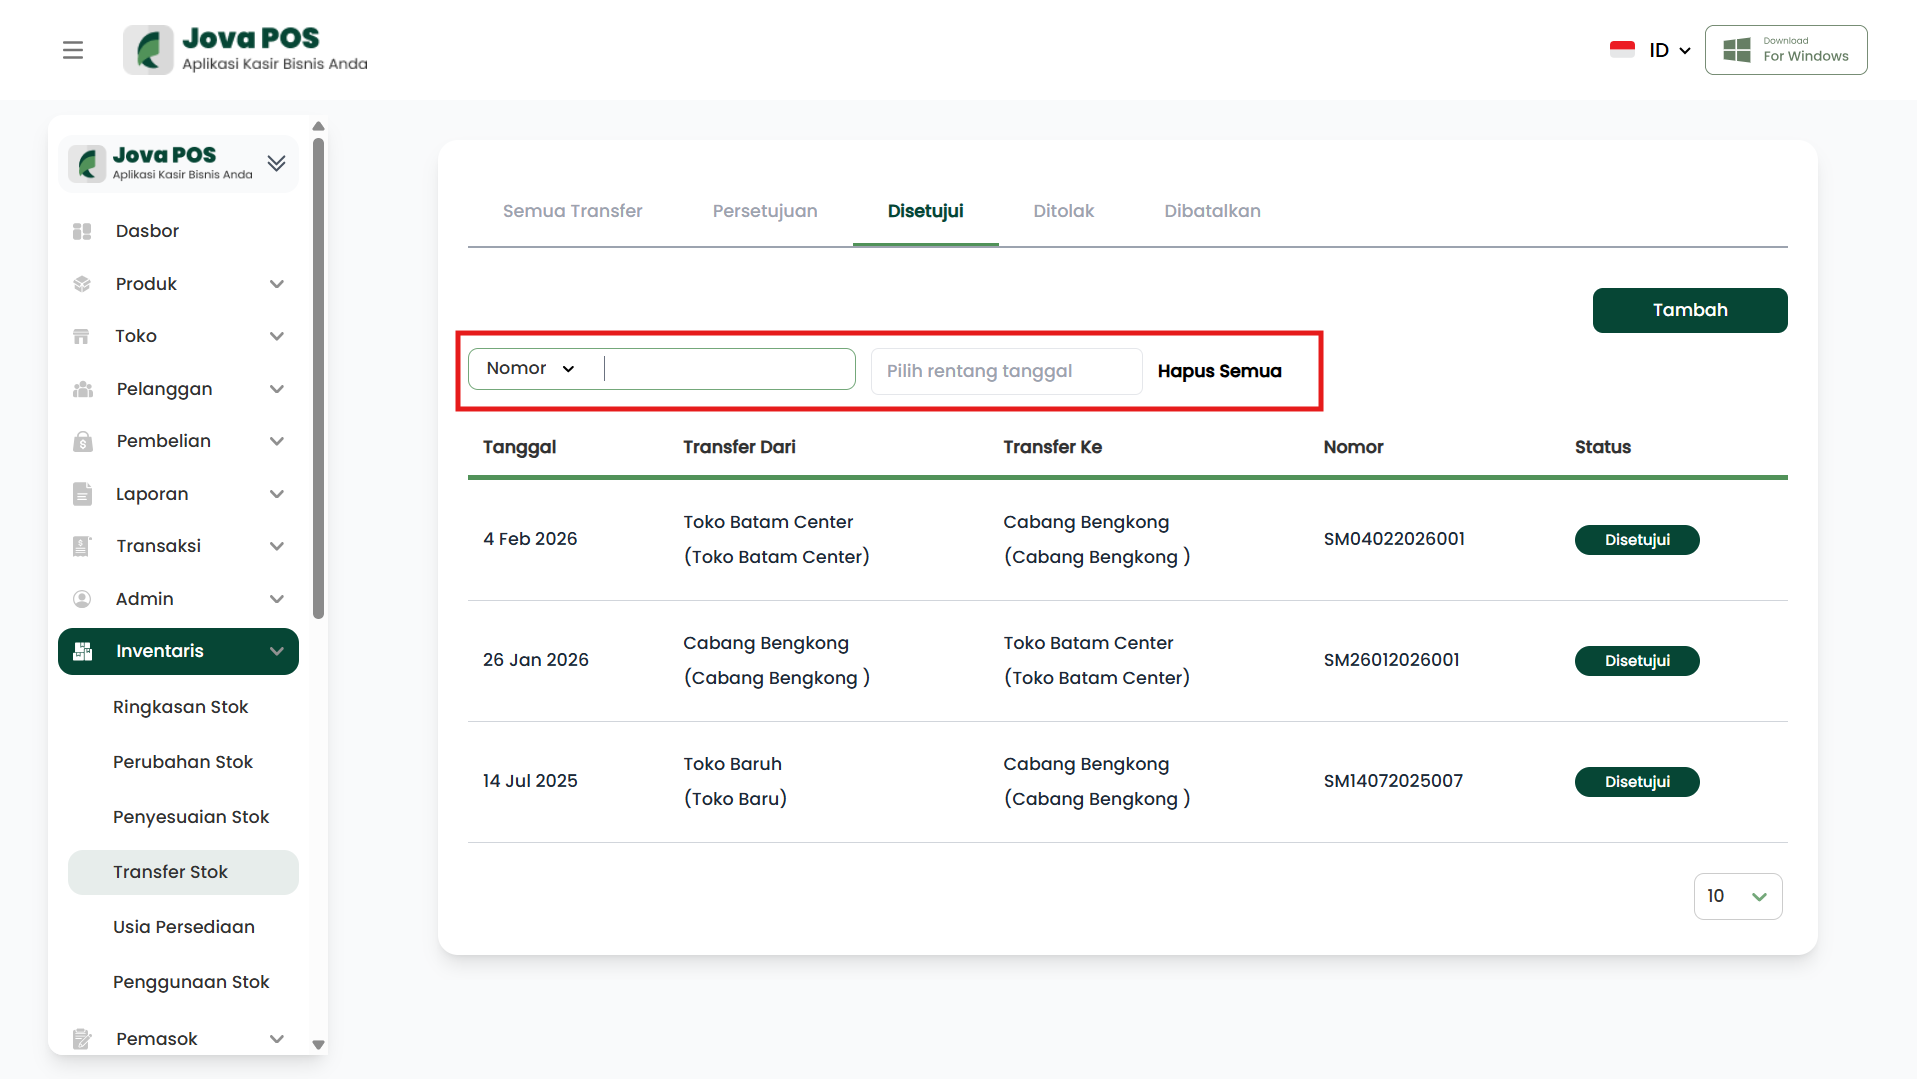
Search Features
- Number: Search by transfer reference number.
- Status: Select the stock transfer status to filter relevant data.
15. Accessing the Rejected Tab
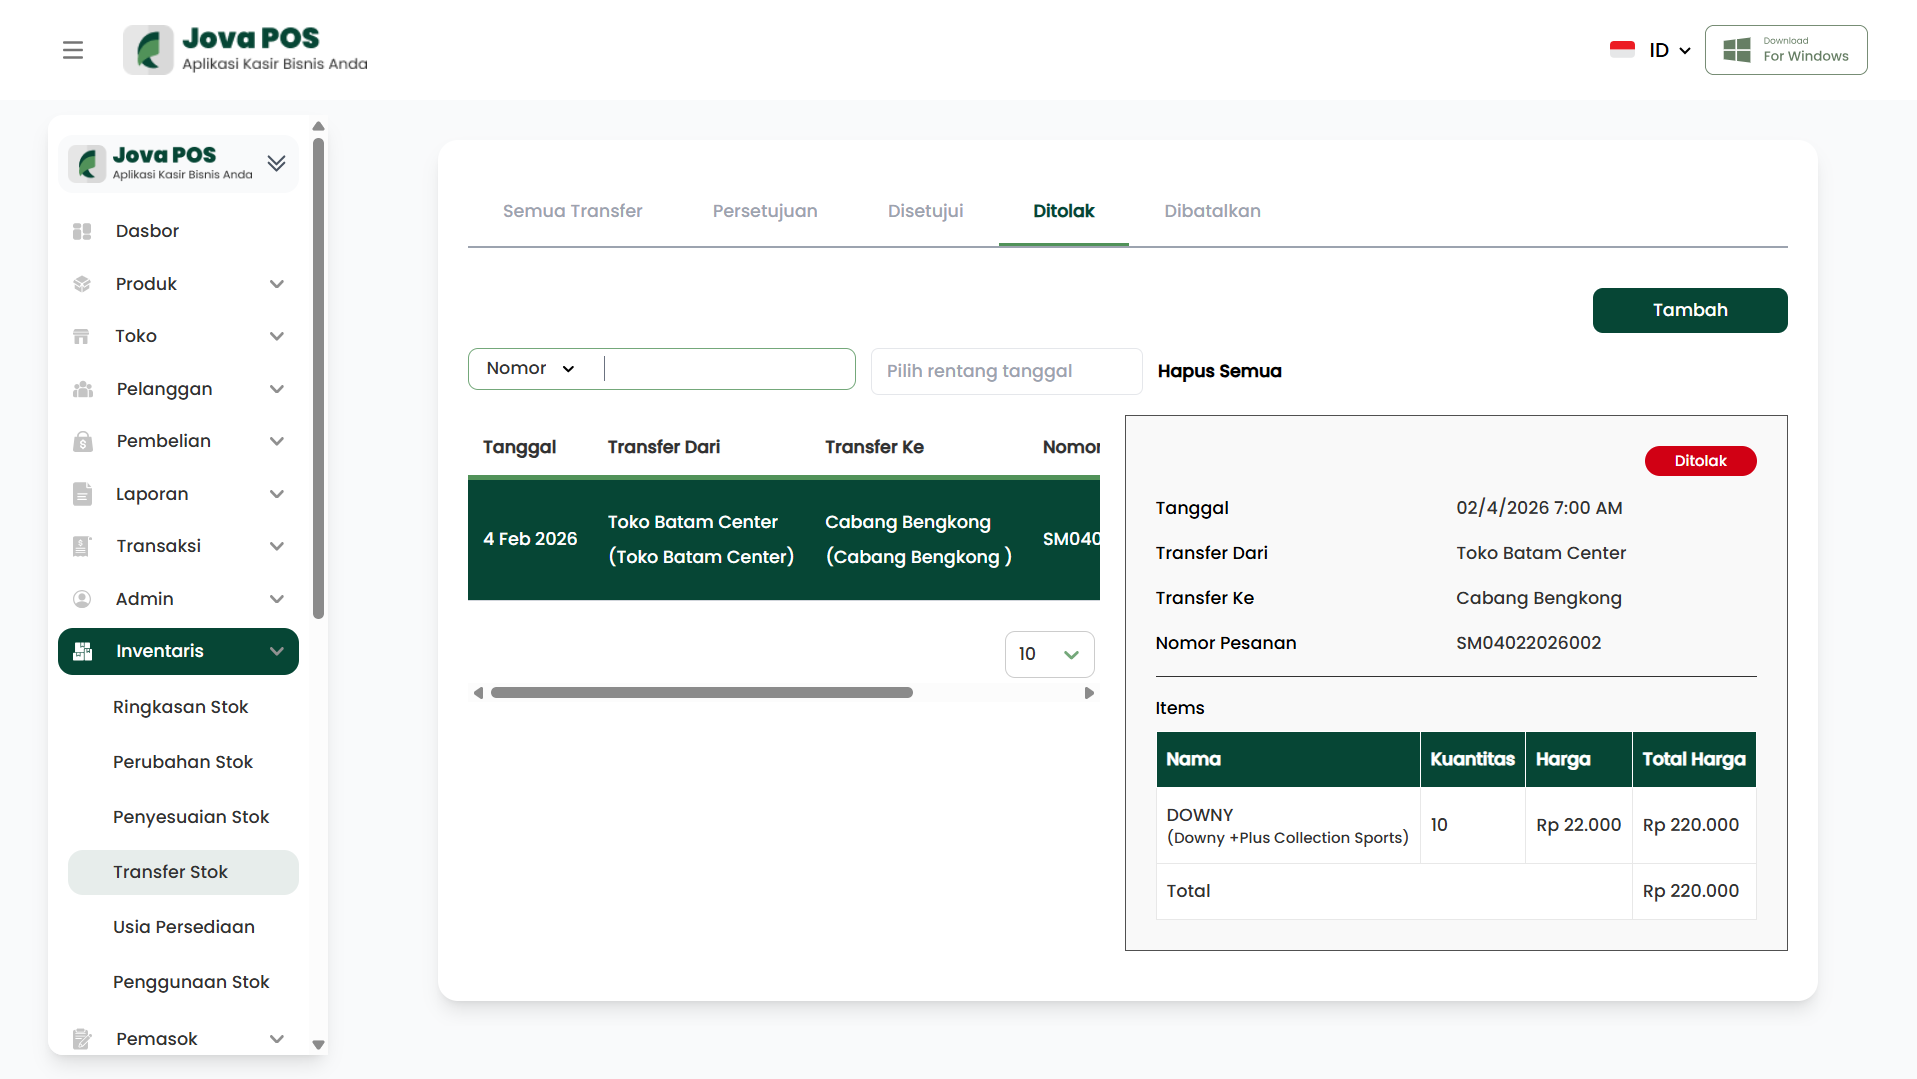
To access the Rejected tab in Stock Transfer, open the Inventory menu and select Stock Transfer. At the top of the page, click the Rejected tab.
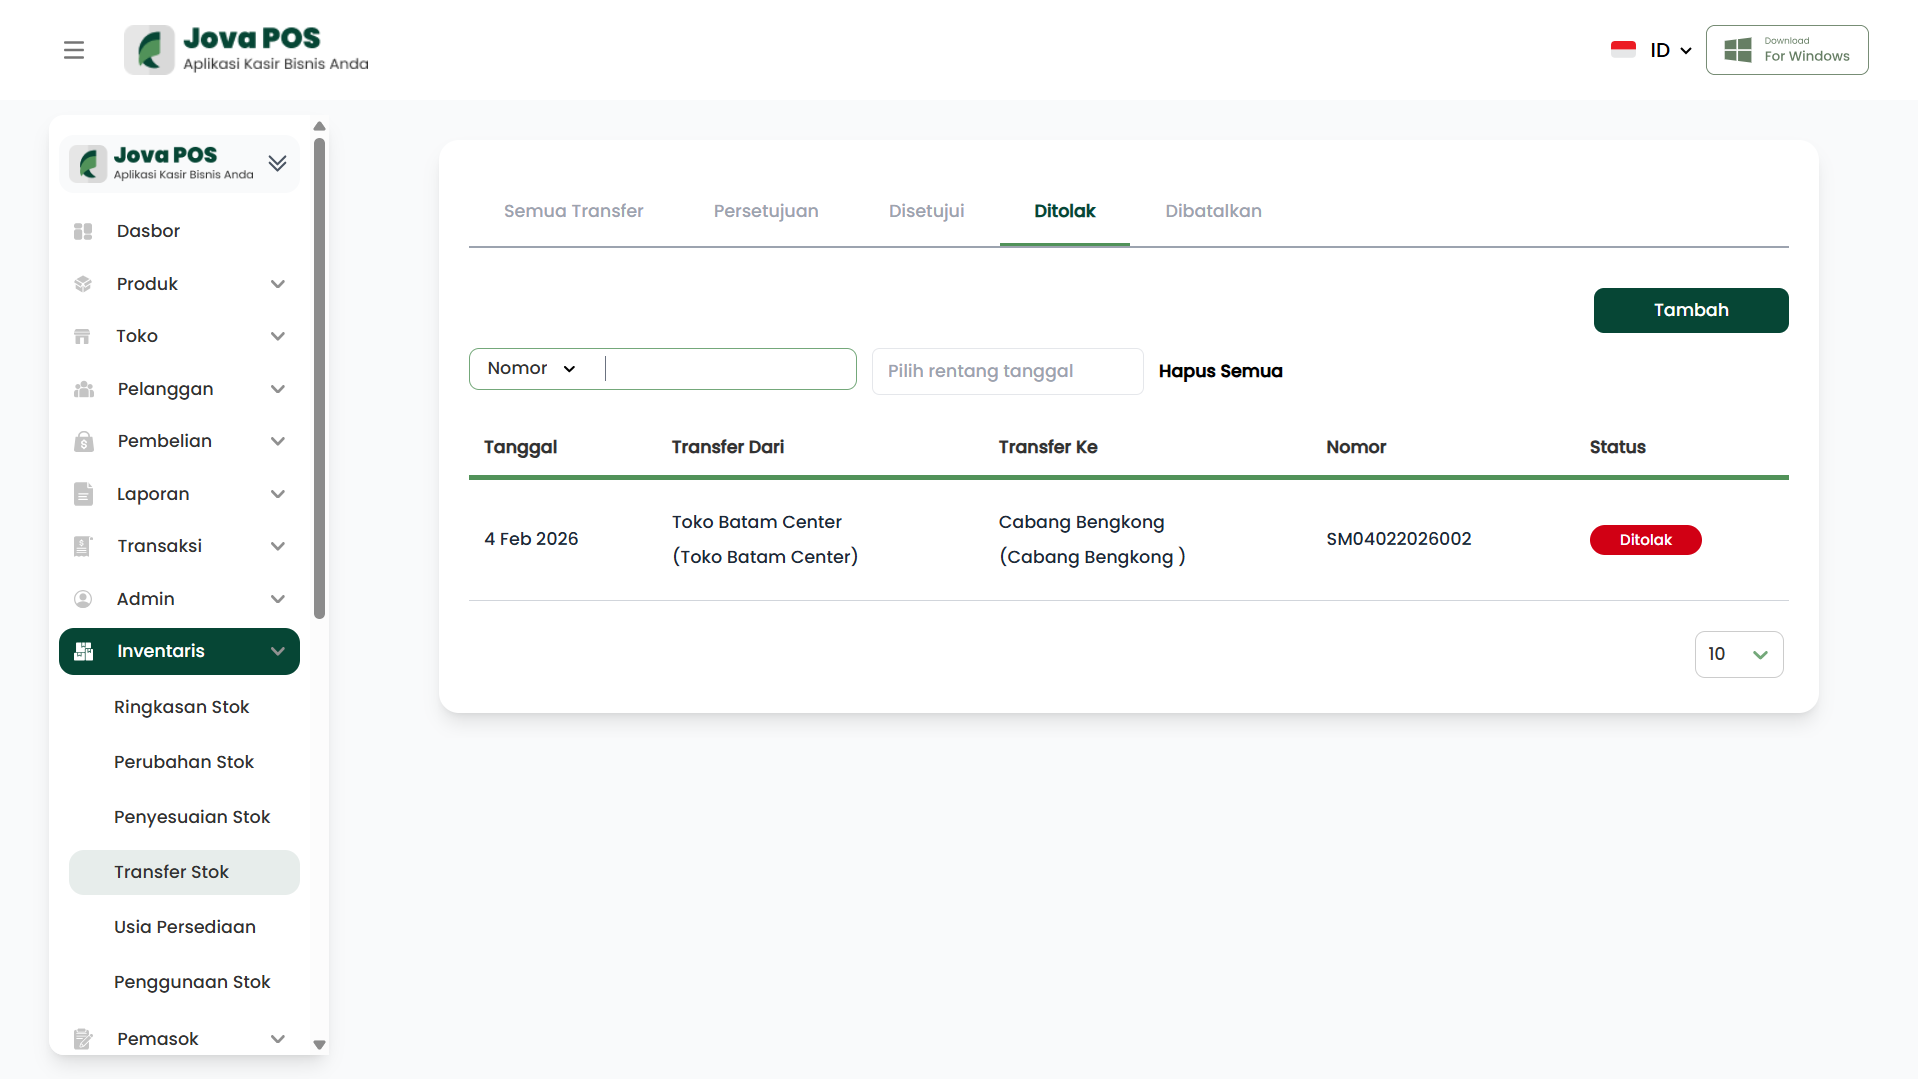
16. Viewing Rejected Stock Transfer Details
In the Rejected tab, you will see a list of rejected stock transfer requests with the following information:
- Transfer Date: The date of the stock transfer request.
- Transfer From: The name of the store that submitted the transfer.
- Transfer To: The name of the store receiving the transfer.
- Order Number: The unique number for the transfer request.
- Status: The transfer status indicating the request has been rejected.
Click the relevant transfer number to view more details about the rejected transfer.
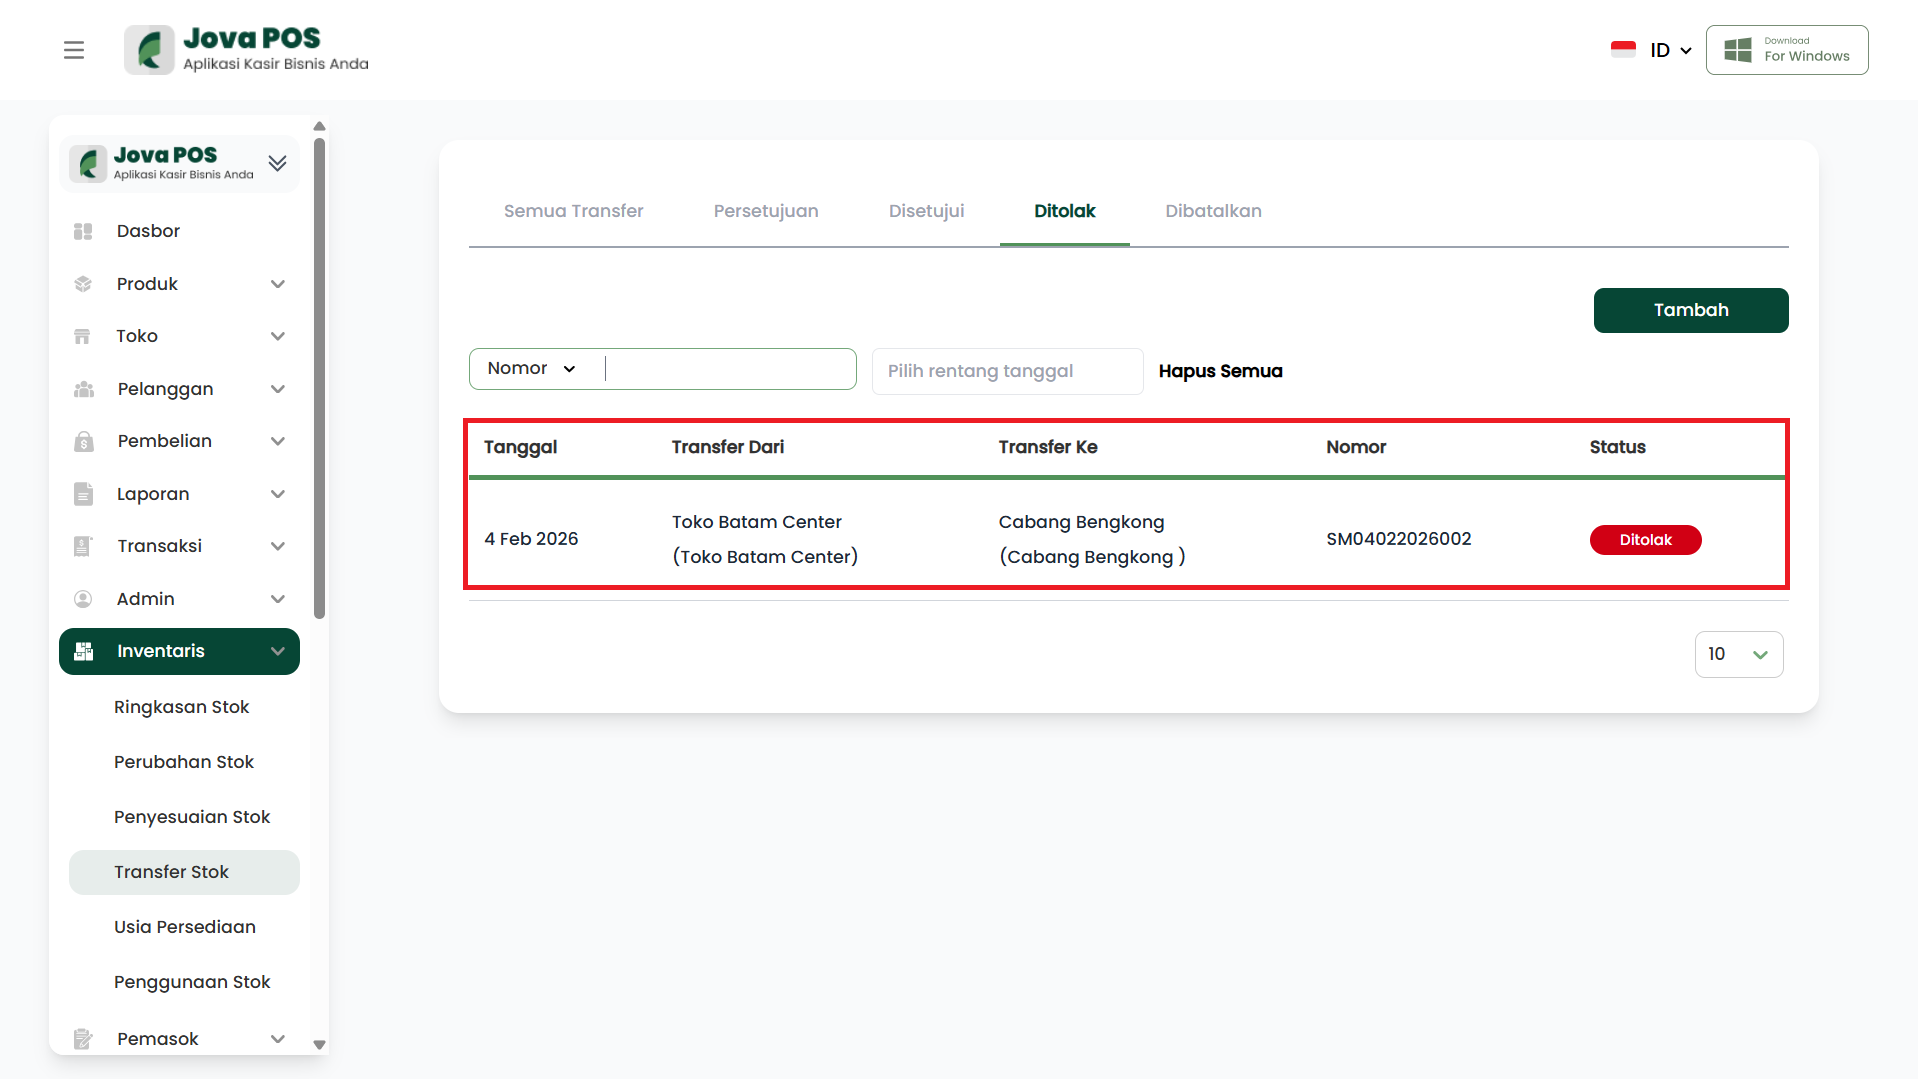
17. Detailed Information in the Rejected Tab
When you click on a rejected transfer request, you will be taken to the detail page showing complete information about the rejected stock transfer, including:
- Transfer Date
- Transfer From
- Transfer To
- Order Number
- List of Rejected Items: A list of items with quantities, prices, and total prices related to the rejected stock transfer.
Conclusion
The Stock Transfer feature in Jova POS makes it easy to move items between stores or warehouses quickly and accurately. This process helps maintain the flow of goods and facilitates stock management across various locations, making business operations more efficient.